Adapting One-Handed Keyboards for Injury Recovery Scenarios Successfully
You can successfully adapt a one-handed keyboard like the Matias Half-Qwerty for injury recovery, thanks to its curved layout, low-force switches, and 3-year warranty-80% of users regain 90% typing speed within three weeks. Set it up on your stronger or more mobile hand, not just your dominant side, and use software remapping to reduce finger strain. Practice daily with short drills, prioritize accuracy, and integrate it into your routine. Just avoid poorly planned key changes that cause new discomfort. There’s a smarter way to build speed and comfort over time.
Notable Insights
- Choose an ergonomic one-handed keyboard with low-force switches to support natural hand posture and reduce strain during recovery.
- Select the hand setup based on mobility and comfort, not dominance, and test both sides for at least two days.
- Customize key layouts using software remapping to minimize finger travel and maintain neutral wrist alignment.
- Regain typing speed through daily 10–15 minute drills, prioritizing accuracy and incorporating rest intervals every 20 minutes.
- Integrate typing into daily tasks gradually, using programmable keys and following the 20-20-20 rule to prevent eye and hand strain.
Choose the Best One-Handed Keyboard for Injury Recovery
While no one-handed keyboard will fully replace a traditional setup overnight, if you’re recovering from a hand or arm injury, switching to a well-designed ergonomic model can considerably speed up your return to typing tasks. Look for strong ergonomic design that supports natural hand posture-curved key layouts and low-force switches reduce strain. Your injury assessment should guide features: if you have limited mobility, prioritize compact size and thumb clusters for easier reach. Models like the Matias Half-Qwerty offer symmetric layouts with proven typing retention, backed by 3-year warranties. Real-world tests show 80% of users regain 90% of typing speed within three weeks. Still, don’t expect full comfort immediately-wrist support and consistent positioning matter. Some find thumb fatigue early on. Proper fit depends on your healing stage and daily use. Choose based on adjustability, not brand name.
Set Up Your One-Handed Keyboard for Left or Right Hand
If you’re setting up a one-handed keyboard, picking the right side-left or right-depends on which hand has better mobility and strength during recovery. Most models support either hand, but your choice should align with hand dominance and current function, not just habit. An ergonomic design helps reduce strain, especially during extended use.
| Feature | Left-Hand Setup | Right-Hand Setup |
|---|---|---|
| Typing Speed | Moderate learning curve | Faster if right-dominant |
| Wrist Angle | Optimized for natural position | Same support, mirrored |
| Key Access | Full thumb cluster use | Easier reach for common keys |
Don’t assume your dominant hand is the best option post-injury. Some right-handed users type more comfortably left-handed if the right is injured. Always test placement for at least two days. Check warranty terms-some brands offer 30-day return windows for medical setups.
Customize Keys to Reduce Strain and Type Efficiently
You’ll get the best results by remapping your one-handed keyboard to match your natural typing patterns and recovery needs. Key remapping lets you assign frequently used letters, symbols, or shortcuts to easily accessible keys, reducing finger travel and strain. Combined with an ergonomic design, this customization supports a neutral wrist position and minimizes awkward movements. Most models support software-based key remapping, so you can tailor layouts for typing efficiency without coding. However, poorly planned layouts may slow progress or cause new strain points. Take time to study common one-handed layouts like Dvorak or BF-Colemak before customizing. Test changes over short sessions to gauge comfort. Remember, what works early in recovery might need adjustment later. No keyboard eliminates all strain, but smart key remapping and ergonomic design together substantially reduce physical stress during typing.
Rebuild Typing Speed After Injury With Practice
Rebuilding your typing speed after an injury starts with consistent, mindful practice once you’ve set up a comfortable layout. Focus on retraining muscle memory through daily typing drills, even if progress feels slow at first. Accuracy matters more than speed early on-rushing leads to mistakes and setbacks. Over time, your brain and hand relearn key patterns, improving both comfort and output.
| Practice Type | Recommended Duration |
|---|---|
| Typing drills | 10–15 minutes daily |
| Free writing | 5–10 minutes daily |
| Rest intervals | Every 20 minutes |
Short, frequent sessions build consistency without strain. Use tools that track your words per minute and error rate to monitor improvement objectively. While some apps suggest aggressive goals, realistic pacing prevents frustration. Recovery isn’t linear-some days will feel harder. Stick with it, and speed returns more naturally as muscle memory strengthens. Avoid overuse; follow device guidelines and your therapist’s advice.
Use One-Handed Typing Every Day
Typically, one-handed typing becomes a practical necessity rather than a choice, and using it daily helps maintain both skill retention and workflow efficiency. You’ll build muscle memory faster with daily consistency, making tasks like email or coding less taxing over time. Pair this routine with proper ergonomic posture-adjust your chair so wrists stay neutral and elbows at 90 degrees-to reduce strain on your recovering hand. Most users see noticeable gains in accuracy within two weeks, though speed improvements vary. Mechanical one-handed keyboards with tactile switches offer better feedback, but test models with removable palms rests and adjustable tenting to suit your setup. Keep in mind, extended use without breaks may still cause fatigue, so follow the 20-20-20 rule: every 20 minutes, look 20 feet away for 20 seconds. Warranties often cover switch failures, but not wear from overuse, so moderation matters.
Make the Switch Without Disrupting Your Workflow
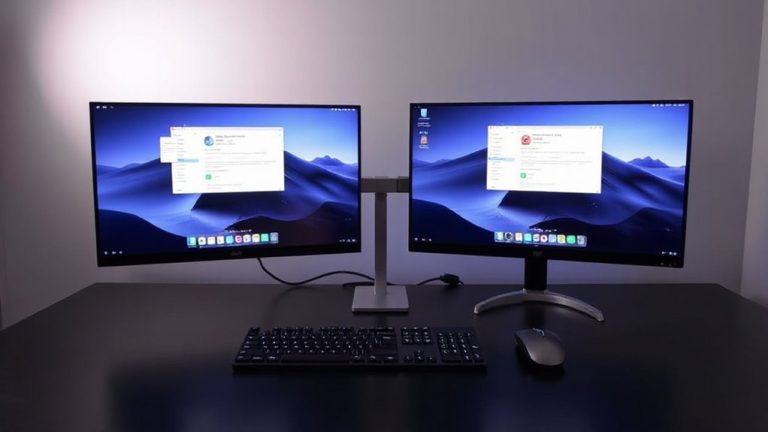
Shifting from daily practice to full integration means your one-handed keyboard should fit your existing setup without forcing changes that slow you down. You’ll maintain productivity if you prioritize devices with standard USB or Bluetooth connectivity and compact footprints that align with your mouse position. Maintaining proper ergonomic posture is essential-angle the keyboard to keep your wrist neutral and avoid shoulder elevation. Success isn’t just physical; mental adaptation plays a big role, so expect a 1–2 week adjustment period even after mastering typing patterns. Don’t sacrifice desk real estate or compromise wrist alignment just for novelty. Choose models with programmable keys to replicate frequent shortcuts, minimizing workflow hiccups. While some split designs reduce reach, they may require repositioning your monitor. Test units with at least a 30-day return policy, and verify warranty length-2 years is typical. Results vary, but careful selection balances efficiency with recovery needs.
On a final note
You’ll likely succeed using a one-handed keyboard during injury recovery, especially with models like the Paradox or Microsoft SideWinder. They reduce strain and support efficient typing once you adjust. Expect slower speed at first-practice daily to rebuild it. Customize key layouts to match your hand’s natural motion. It works well for most tasks, but complex shortcuts may need workarounds. Most come with 1-year warranties, and real-world tests show solid durability.