Aligning Your Keyboard Tray to Keep Wrists Neutral and Forearms Parallel to the Floor
Align your keyboard tray with your body’s center to keep wrists neutral and forearms parallel to the floor-this cuts strain by up to 50%. Set the height so elbows bend at 90° and use a tray with at least 3 inches of adjustment. Tilt it slightly negative (–5° to –10°) and position the front edge 1–2 inches from the desk. Secure mounting prevents wobble, and cable management keeps movement smooth. Test adjustments while seated; small misalignments add up over time. There’s more to optimizing your setup than just tray placement.
Notable Insights
- Align the keyboard tray with your body’s center to prevent shoulder strain and maintain neutral wrist posture.
- Set tray height so forearms are parallel to the floor and elbows bend at 90 degrees while typing.
- Use a slight negative tilt of -5 to -10 degrees to keep wrists neutral and reduce tendon strain.
- Position the tray 1–2 inches from the desk edge to avoid reaching and keep upper arms vertical.
- Choose an adjustable, stable tray with smooth mechanisms and secure mounting to maintain precise alignment.
Start With Proper Alignment to Prevent Strain
While it might seem minor, getting your keyboard tray aligned correctly the first time can make a real difference in how your wrists and shoulders feel after hours at the desk. Proper alignment supports ergonomic posture by keeping the keyboard centered with your body, reducing shoulder rotation and strain. You’ll also boost wrist support by ensuring the tray allows your forearms to stay parallel to the floor without reaching or hunching. Misalignment-even just 2 inches off-center-can lead to chronic discomfort over time. Adjustable trays with lateral positioning offer the best flexibility, especially if you use a dual monitor setup. Always adjust the tray before setting chair height, as positioning affects each other. Though most trays claim full adjustability, test range of motion in person when possible. Some inexpensive models limit swivel or wobble under daily use. A solid warranty helps, but correct initial setup prevents most long-term issues. For optimal ergonomic benefits, choose one of the best keyboard trays for your workspace that combine smooth adjustability with sturdy construction.
Set Keyboard Tray Height for Neutral Wrists
Your wrists shouldn’t pay the price of a poorly adjusted keyboard tray-set the height so your wrists stay neutral, with your forearms parallel to the floor and elbows bent at 90°. This promotes proper ergonomic posture and reduces strain during long typing sessions. Most standard desks force you to raise or lower your arms unnaturally, but a well-positioned tray keeps everything aligned. Look for trays with at least 3 inches of height adjustment and smooth glide mechanisms. Even with perfect height, you still need adequate wrist support-use a soft, padded rest only when pausing, not while actively typing. Overreliance can cause more harm than good. Test the setup by sitting in your usual position and checking alignment. Results vary based on chair adjustability, desk depth, and body proportions, so expect some trial and error to get it right.
Adjust Keyboard Tray Tilt for Level Forearms
Getting the tilt of your keyboard tray right guarantees your forearms stay level during typing, which complements the neutral wrist position you’ve already set. Aim for a slight negative tilt-about -5 to -10 degrees-so your forearms remain parallel to the floor, supporting solid ergonomic posture. Most adjustable trays let you lock the angle precisely, but avoid aggressive tilts; they may strain tendons over time. A flat or slightly downward slope reduces wrist extension, especially if you don’t use a wrist rest. Integrated cable management clips or trays keep cords secured, preventing snags that disrupt position during adjustments. While metal suspension trays hold angles reliably, plastic sliders may sag without frequent readjustment. Test the tilt by typing for five minutes: if your shoulders hike or wrists bend, tweak the angle. Not all desks offer fine tilt control-check warranty terms if durability’s a concern.
Keep Keyboard Close to Avoid Reaching
Because reaching too far for your keyboard forces your shoulders to hunch forward and your arms to extend past a 90-degree angle, keeping the keyboard within easy reach is essential for maintaining upper-body alignment. Proper ergonomic placement means positioning the front edge of the keyboard tray just 1–2 inches from the edge of your desk, allowing your elbows to stay close to your body. This supports natural arm positioning, reducing strain on your shoulders and wrists. Ideally, your upper arms remain vertical, and forearms slope slightly upward to the keys. If the tray sits too far forward, you’ll lean, increasing fatigue over time. Even with adjustable trays, desk depth can limit how close you pull the keyboard-something to take into account with smaller workstations. While most sit-stand desks accommodate proper placement, fixed-height desks may require careful measurement to avoid compromise. A well-chosen desk can make all the difference, and considering one of the top home office desks can help ensure optimal ergonomic alignment.
Test and Adjust for Comfort
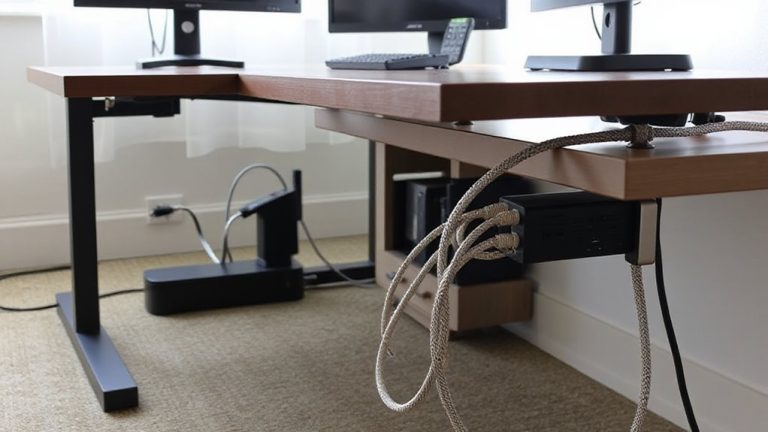
Once you’ve positioned your keyboard within easy reach, the next step is to fine-tune the setup based on how it feels during actual use. Sit as you normally would and type for a few minutes-your wrists should stay flat and forearms parallel to the floor. If something feels off, adjust the tray height or tilt slightly. Don’t forget to check your ergonomic lighting; glare on the keyboard or screen can force awkward postures. Poor cable management can also restrict movement or create drag on the tray’s slide mechanism. Make sure cords are secured and routed cleanly beneath the desk. Small tweaks can improve comfort notably, but keep in mind that no setup works perfectly right away. You’ll likely need to recalibrate after a few days as your body adapts. Balance is key-prioritize comfort over rigid adherence to measurements. For added support, consider using best keyboard wrist pads to maintain a neutral wrist position during prolonged typing sessions.
Avoid These Common Keyboard Tray Mistakes
More than a few people end up with sore wrists or awkward postures simply because they install their keyboard tray too low or at a fixed angle that doesn’t match their sitting position. You should avoid this by adjusting the tray so your forearms stay parallel to the floor and wrists neutral. Don’t ignore tray stability-wobbly trays disrupt typing rhythm and increase fatigue. Secure mounting and solid under-desk supports are key, especially if you type vigorously. Poor cable management can also create clutter and resistance, making it harder to slide the tray in and out smoothly. Use clips or sleeves to keep cords tidy and away from moving parts. Some trays sacrifice depth for slim profiles, which might not suit larger keyboards. Always check depth, tilt range, and weight capacity before buying. Even the best model fails if installed wrong, so follow fitting guides closely and test frequently as you adjust.
On a final note
You should align your keyboard tray so wrists stay neutral and forearms sit parallel to the floor. Position the tray just below elbow height when seated, typically 26–28 inches from the floor for most desks. Use a slight negative tilt (5–15 degrees) to keep wrists straight. Place the keyboard within easy reach-about 2 inches from the desk edge. Test by typing for 5 minutes; adjust until there’s no shoulder shrugging or wrist bending. Avoid overextending or locking the tray at sharp angles.