Drilling Precision Holes in Wooden Desks for Vertical Cable Feeds
Use an 18V cordless drill with a sharp 8mm or 10mm high-speed steel twist bit for clean, precise vertical cable holes. Pair it with a brad-point bit and a backer board underneath to prevent splintering, especially on veneered plywood or hardwood. Mark holes near the rear edge, at least 2 inches from the edge, and use a guide block to drill straight. Sand edges smooth and add a light chamfer for a clean finish. There’s more to get right for long-term durability and safety.
Notable Insights
- Use a sharp brad-point or HSS twist bit to ensure clean, precise holes with minimal splintering in wood.
- Clamp a backer board beneath the desk to prevent exit-side tear-out when drilling through the surface.
- Mark hole locations at least 2 inches from edges and align them with outlets for optimal cable routing.
- Employ a guide block clamped to the desk to maintain perpendicular drilling and prevent bit wandering.
- Sand hole edges and apply a light chamfer to improve appearance and ease of cable insertion.
Choose the Right Drill and Bit for Desk Cable Holes
While you might be tempted to grab the first drill you find, using a cordless 18V drill with a 3/8-inch chuck is your best bet for clean cable holes in wood desks-just make sure it has a clutch to prevent overdriving. For drill speed, stick to a variable-speed model (500–1,800 RPM); lower speeds give you better control and reduce tear-out. A high-quality twist bit made of high-speed steel (HSS) is ideal-its bit material resists heat and wear while slicing smoothly through solid wood and plywood. Avoid cheaper carbon steel bits; they dull fast and risk splintering edges. Pair an 8mm or 10mm bit with pilot holes for best results. Corded drills work but limit mobility. While brushless motors last longer, standard models deliver sufficient torque. Always check battery charge-low power increases heat and poor hole finishes.
Mark Your Desk for Perfect Cable Hole Placement
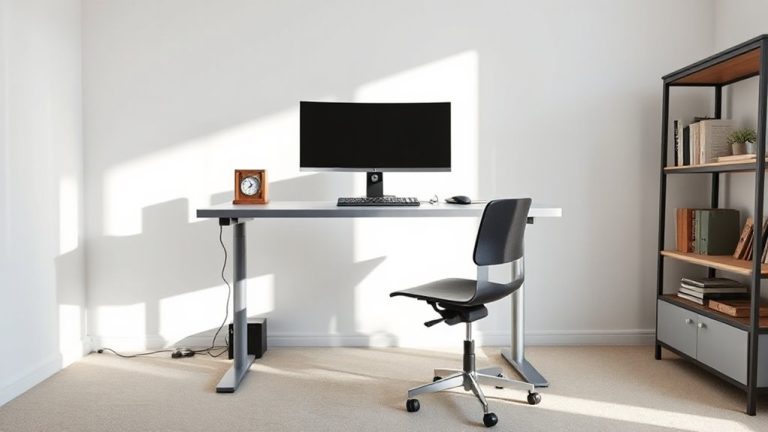
Where exactly should you put those cable holes to keep your desk clean and functional? For best cable management, mark spots near the back corners or along the rear edge, at least 2 inches from the edge to avoid weakening the wood. Center the holes where your power strip or wall outlets line up-this reduces slack and keeps cords running straight down. Always measure twice before marking; even a small misalignment can hurt furniture aesthetics or force awkward cord bends. Use a pencil and a square to guarantee your marks are level and symmetrical. If you have dual monitors or multiple devices, consider two holes instead of one large one-this gives you more routing flexibility. Poor placement can lead to clutter, not less, so prioritize function without sacrificing the desk’s clean look. A well-planned setup enhances both aesthetics and efficiency with cable management solutions.
Stop Splintering on Both Sides of the Wood
To get clean, splinter-free holes in your wooden desk, use a sharp brad-point drill bit designed for hardwood-these bits shear the wood fibers cleanly instead of tearing them. A sharp bit is essential; dull ones crush the edge and increase tearout. Clamp a scrap piece of plywood or MDF beneath as a backer board to support the wood on the exit side, reducing splintering when the bit breaks through. This setup works especially well on veneered or finished surfaces, where damage is more visible. You’ll get cleaner results in both soft and hardwoods, though hardwoods demand sharper tools and slower feed rates. While a backer board adds a small setup step, it’s far more effective than relying on technique alone. Just be sure to align it tightly to avoid snipe or uneven pressure. The improvement in hole quality is noticeable, but only if your bit stays sharp-replace it at the first sign of wear.
Drill Straight Holes Using a Guide Block
If you want your cable feed holes to align perfectly without wandering, clamp a simple guide block to your desk’s surface-it’ll keep the drill bit from skidding and guarantee a perpendicular entry. Proper guide block alignment is critical; even a slight angle can throw off your hole’s trajectory, especially through thick desktops. Use a square to align the block with the drilling surface and clamp it firmly. A hardwood block with a pre-drilled pilot hole matched to your bit diameter works best. Pair this with steady drill speed control-start slow to establish the hole, then increase speed to maintain clean cutting without overheating. Too fast, and you risk burning wood or destabilizing the bit. This method isn’t flawless; misaligned blocks mean crooked holes, and softwoods can still compress slightly. But with attention to detail, it’s one of the most reliable, low-cost ways to achieve accurate, repeatable results.
Sand and Chamfer Holes for a Clean Finish
A clean finish starts with sanding and chamfering your cable feed holes-it not only removes splinters but also gives the hole a professional, polished look that’s safer and easier to feed cables through. Use fine-grit sandpaper (120–220) to smooth edges around both entry and exit points, reducing the risk of frayed cords or splinters. Then, lightly chamfer the rim with a file or deburring tool to create a subtle bevel-this helps guide cables in cleanly. A clean finish isn’t just visual; it improves function, especially when routing multiple cords. But don’t over-chamfer-aggressive shaping weakens the wood near the edge. Work slowly, checking often, to maintain structural integrity. This step adds five to ten minutes per hole but markedly enhances durability and appearance. While it’s possible to skip this, doing so risks rough spots that degrade both performance and aesthetics over time. Smooth edges matter-not just for looks, but for daily use.
On a final note
You’ll get clean, functional cable ports by using a sharp brad-point bit and a drill guide. Mark holes precisely, clamp a backup board to prevent blowout, and drill straight with steady pressure. Light sanding removes splinters, while a chamfered edge improves cable access. Remember that hardwoods hold edges better than soft plywood, which may tear out. Measure twice-mistakes are permanent.