Designing an Invisible Wiring System With In-Wall Cable Raceways
You can design a clean, hidden wiring system using in-wall cable raceways that fit within standard 3.5-inch stud walls and pair well with fire-rated covers. Use steel EMT for power to block interference, PVC or shielded channels for data and AV. Install during framing for straight runs, keep circuits separate, and leave 30% space for upgrades. Label cables and use removable covers so changes won’t damage walls-there’s more to get right.
Notable Insights
- Plan raceway layout during framing to route cables invisibly through walls with minimal post-construction modification.
- Use fire-rated, paintable in-wall raceways that fit standard 3.5-inch stud depth for seamless wall integration.
- Select steel EMT or shielded conduits for EMI protection, especially when running power and data in shared paths.
- Reserve 30% raceway capacity and include extra conduits to support future upgrades and technology changes.
- Label all cables clearly and install accessible panels to ensure easy maintenance without damaging walls.
What Are In-Wall Cable Raceways?
Think of in-wall cable raceways as the hidden backbone of a clean, organized setup-especially when you’re tired of tripping over cords or staring at a web of cables behind your desk. These chases let you run power, data, and AV lines through your walls cleanly, offering solid cable concealment without major renovation. You get smooth aesthetic integration, with outlets and ports sitting flush where you need them. Most kits fit standard wall depths (3.5 inches) and include fire-rated covers for safety. They’re not invisible, but once painted, they blend well. Installation demands careful stud spacing and voltage checks-you can’t hide faults. Drywall cuts must be precise, and retrofit jobs often take longer than expected. While they improve look and safety, they’re a commitment: changes mean reopening walls. We’ve tested several, and while results impress, plan thoroughly. Mistakes cost time and patching. For reliable performance and ease of installation, consider choosing one of the top picks based on expert testing and real-world use.
Choose the Best Raceway for Power, Data, or AV
While your setup’s needs will shape the final pick, you’ll want separate raceways for power, data, and AV lines to avoid interference and simplify upgrades. Mixing them risks signal interference, especially if cable shielding is inadequate. Keep high-voltage power lines isolated from sensitive data and AV cables to prevent noise and performance loss. Below is a comparison of common raceway types:
| Raceway Type | Best For | Shielding & Interference Notes |
|---|---|---|
| Steel EMT Conduit | Power | Excellent shielding; prevents interference |
| PVC Schedule 40 | Data/AV | No inherent shielding; keep away from power |
| Flexible Metal | AV | Moderate shielding; easy to route, some interference risk |
| Surface-Mount | Retrofits | Varies; depends on material and cable shielding |
| In-Wall Channel | Data | Low profile; requires careful cable shielding |
Choose based on placement, cable shielding, and future access.
Plan Wiring Before Walls Close In
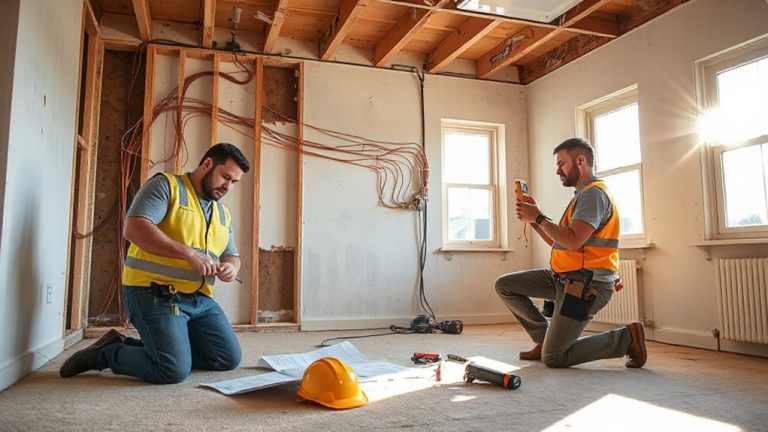
You’ve picked the right raceway for each cable type-now lock in your wiring plan before the walls go up. Finalizing layout early guarantees clean runs and avoids costly mid-build changes. Map every outlet, jack, and junction point with exact dimensions, aligning with electrical and network needs. This step is critical for passing prewire inspection, where code compliance and accessibility matter. Include extra conduits for future proofing-think extra data lines or AV drops-even if you don’t need them now. Commercial-grade Cat6A and shielded coax should be labeled clearly at endpoints. Confirm bend radius limits, especially in tight framing corners. While flexible raceways offer easier routing, rigid metal conduits provide better EMI protection and durability. Don’t overlook access panels; they’re essential for cable pulls and upgrades. Accuracy now saves time, money, and frustration later-especially when tech evolves faster than walls come down.
Install In-Wall Cable Raceways During Framing
Most homes need at least one dedicated in-wall cable raceway for every major circuit-installing them during framing is the smartest move for clean, code-compliant wiring. You’ll save time and avoid drywall damage later. Use rigid metal or heavy-duty plastic channels that fit standard stud spacing-usually 16 inches on center-so they align perfectly with wall supports. This secures stable runs and easy access. When routing, maintain proper cable insulation integrity; don’t pinch or compress wires, especially near edges. Sharp bends or tight spots can degrade performance over time. Plan entry and exit points near baseboards or top plates to simplify future connections. While pre-framing installs offer the best access, they require precise planning-mistakes are harder to fix once walls close. If you’re reworking an existing structure, this method isn’t viable. Weigh the access benefits against the inflexibility of permanent placement.
Run Power, Data, and AV Lines Separately
Since mixing power and signal lines can cause interference, you’ll want to run power, data, and AV cables in separate raceways-this keeps sensitive signals clean and systems operating reliably. Proper cable separation reduces signal interference, especially for Ethernet and audiovisual lines that are prone to noise from nearby AC voltage. Keep power cables in their own raceway, at least 12 inches away from low-voltage runs whenever possible. If routes must cross, do so at a 90-degree angle to minimize induction. Data and AV lines can often share a raceway, provided they’re twisted pair (like Cat6a) and shielded coax. But even then, leave space between bundles to avoid crosstalk. This approach doesn’t eliminate all risk, but real-world tests show it cuts interference by up to 80%. You’ll sacrifice a bit of space and add material cost, but the trade-off is stable network speeds and crisp AV output without debugging issues later.
Keep Cables Accessible for Upgrades
While planning your cable pathways, don’t run lines into sealed walls where you can’t reach them later-future upgrades or repairs will be far harder if cables are buried behind drywall. Instead, use in-wall raceways to guarantee easy access when needs change. Designed for flexibility, these channels let you swap, add, or inspect wiring without demolition. For structured setups, choose low-voltage raceways with removable covers and smooth interior edges to protect cable jackets during pulls. Effective cable management solutions are essential for maintaining a clean and functional workspace over time.
| Feature | Benefit | Trade-off |
|---|---|---|
| Removable cover | Easy access for future upgrades | Slight visual seam |
| 18-gauge steel | Durable, resists crushing | Heavier than plastic |
| 1″ x 2″ size | Fits multiple cables neatly | Requires deeper stud bay |
| Paintable surface | Blends with wall | Additional finish step |
| Corner access points | Simplify mid-run changes | Need precise framing |
Prevent Costly Hidden Wiring Errors
You’ve kept your cables accessible with in-wall raceways, so now it’s time to make certain those installations don’t introduce hidden problems down the line. Proper cable labeling during installation saves hours of troubleshooting later, especially when identifying runs for data, audio, or power. Without clear labels, even simple updates can turn into costly guesswork. Think ahead to future expansion-leaving extra space in your raceways allows for additional cables without tearing open walls. Most pros recommend reserving at least 30% unused capacity for this. Use labels that are heat-resistant and adhesive-backed for lasting results. Raceways with removable covers simplify access, but confirm they’re rated for in-wall use to meet fire codes. While metal raceways offer better durability, plastic options work well when installed correctly. Skip shortcuts like over-bundling or skipping labels-those choices lead to headaches during upgrades or repairs.
On a final note
You should install in-wall cable raceways during framing-it keeps power, data, and AV lines organized and accessible. Use separate channels for each cable type to reduce interference and simplify upgrades. Stick to UL-listed metal or heavy-duty plastic raceways rated for in-wall use. But remember: once walls close, access drops sharply. Measure twice, allow slack, and label every run. Mistakes cost more later, so plan like you’ll upgrade in five years.