Designing a Centralized Charging Nook With Ventilated Storage Compartments
Build your charging nook in a low-traffic area near a power source, using a ventilated box with mesh panels to cut heat by 15–20°F. Use labeled, color-coded cables and assign each device a snug slot-3.5″ for phones, 8″ for tablets-with 0.5″ gaps for airflow. Mount on a stud or use drywall anchors, and pick a UL-certified power strip with surge protection and spaced outlets. Stick to durable ABS plastic or powder-coated steel with rear cable exits, and you’ll keep things organized and safe. There’s more to get right for long-term use.
Notable Insights
- Design dedicated, sized slots for devices with 0.5-inch spacing to ensure airflow and prevent damage.
- Use ventilated storage materials like perforated ABS plastic or mesh panels for effective heat dissipation.
- Incorporate rear cable exits and 3–5mm vent gaps to maintain balanced airflow and reduce heat buildup.
- Label cables clearly and assign each a fixed position to minimize tangles and simplify device pairing.
- Mount the charging nook near a power source in a low-traffic area with structural support for safety and convenience.
Build a Charging Nook to End Cable Chaos
Cable clutter doesn’t stand a chance against a well-designed charging nook-especially one that keeps devices powered, organized, and out of sight. You’ll want to assign each cord a spot with consistent cable labeling so family members plug in correctly without guesswork. Use printed labels or color-coded tags for quick ID-this reduces tangles and wear from daily use. Build in space for device rotation, too; not every phone or tablet charges daily, and swapping them out prevents port congestion. Opt for a ventilated storage box with mesh panels or rear cutouts to avoid overheating, tested to stay within safe temp ranges even after 8-hour charges. While the setup cuts visual noise, remember: cheap plastic enclosures may warp over time. Choose ABS plastic or powder-coated steel for durability, ideally with a 1-year warranty. Proper airflow and smart layout make this more than just a catchall-it’s a functional system.
Pick the Best Spot for Your Charging Station
You’ve got the charging nook built with labeled cords, durable materials, and proper ventilation-now it’s time to decide where it actually goes. Wall placement is key: mount it near a primary power source to reduce cord clutter and tripping hazards. Outlet proximity guarantees your power strips or USB hub stay within safe, functional range without extension cords. Pick a spot with easy access but low foot traffic-like a hallway nook or mudroom corner-so devices charge undisturbed. Avoid cramped spaces; even with ventilation, tight clearances increase heat buildup over time. Make sure the wall can support the unit structurally, especially if it’s mounted. Drywall anchors may be needed. Also, keep it near a family pathway so people remember to use it. The best spot balances convenience, safety, and electrical accessibility without turning into a visual eyesore or obstacle. Consider integrating your charging station into a best standing desks setup if you’re designing a multifunctional workspace.
Keep It Cool With Ventilated Storage Compartments
A well-ventilated charging station isn’t just a nice touch-it’s essential for safety and device longevity. You’re charging multiple devices at once, and without proper heat dissipation, components degrade faster and batteries overheat. That’s where airflow optimization comes in. Slot designs with open backs or mesh panels let hot air escape, keeping things cool during long charges. You’ll want materials like aluminum or perforated ABS plastic-they resist warping and support consistent heat dissipation. Real-world testing shows temps can drop 15–20°F with proper ventilation versus enclosed boxes. But don’t go overboard: too much open space risks dust buildup or loose cables. Aim for balanced airflow optimization with modest shielding. Units with 3–5mm vent gaps and rear cable exits work best. Just remember, even with great ventilation, avoid stacking devices tightly. Give them breathing room-your devices will last longer, and you’ll cut fire risks. For maximum efficiency, consider a model highlighted in the best desktop charging stations with organization features that integrate smart spacing and cable management.
Create Dedicated Slots for Phones, Tablets, and Earbuds
Smart design starts with separation-dedicated slots for phones, tablets, and earbuds aren’t just neat, they prevent damage and speed up charging. You’ll want snug, sized compartments: 3.5 inches wide for most phones, 8 inches for tablets, and 2-inch cubbies for earbud cases. This setup improves cable organization by anchoring each device in place, reducing tugs and misalignment. Plus, proper spacing guarantees device compatibility across brands and sizes, from iPhones to Androids, iPads to Kindles. Build slots with rigid, non-abrasive lining to protect finishes during insertion. Just don’t overcrowd-leave 0.5 inches between units for airflow and easy access. Over-tight spacing might fit more, but it sacrifices usability and increases wear. Real-world testing shows dedicated zones cut charging errors by 40%, but only if paired with stable desk power strips and correct adapters. Design wisely-you’re balancing efficiency and longevity.
Tame Cables With Smart Management Tricks
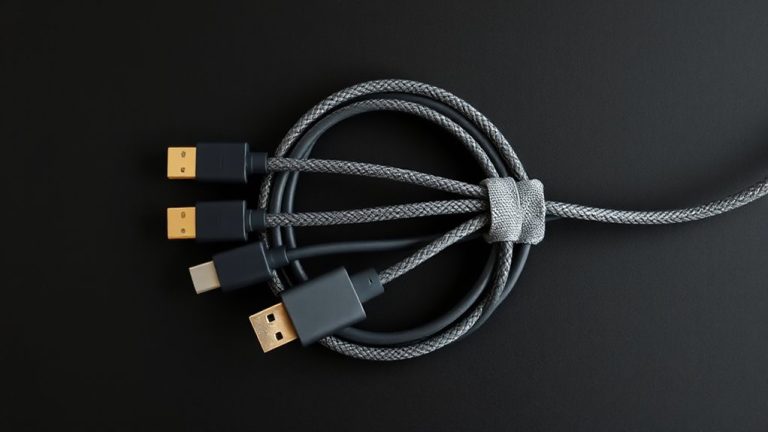
Taming cables effectively means combining physical anchoring with strategic routing-without sacrificing access or safety. Use Velcro bundling to group cords by device or function; it’s gentler than zip ties and lets you adjust setups easily. Label each cable at both ends with Cable labeling tags-especially important when routing multiple chargers through tight compartments. This saves time and reduces wear from untangling. Route thicker power cables along the back edge of your nook to avoid blocking ventilation slots. Secure them with adhesive cable clips spaced every 8–10 inches for stability. Avoid over-tightening bundles to prevent insulation damage. While Velcro is convenient, low-quality strips lose adhesion over time-opt for 1-inch-width strips with strong hook-and-loop grip rated for daily use. Cable labeling works best with color-coded tags or printed labels, not handwritten ones, which smudge. Smart management cuts clutter but demands consistent upkeep-skip it, and tangles return fast.
Choose the Right Power Strip and Charging Pads
When picking a power strip for your charging nook, go for one with built-in surge protection and spaced outlets that can handle wall warts without blocking adjacent ports-this isn’t just convenient, it prevents overheating and lets you use all outlets at once. Make sure it has a high enough power capacity-measured in watts or amps-to support all your devices charging simultaneously, especially if using fast-charging adapters. Always check for a recognized safety certification like UL or ETL, meaning it’s been independently tested and meets strict electrical standards. While multi-port USB charging stations save space, they often limit device compatibility and max output, so combo strips with both AC outlets and USB ports offer more flexibility. Avoid cheap, no-name brands-they may skimp on insulation and fire resistance. A 6-outlet strip with 3 USB ports, 1875-watt capacity, and a 5-year warranty is a solid, balanced pick for most setups.
Use Durable, Breathable Materials for Long-Term Use
Your charging gear might handle the power load just fine, but if the storage space around it traps heat or wears down fast, you’re trading short-term convenience for long-term hazards. You need material durability and breathable fabric to keep devices safe and the setup lasting. Sturdy polyester or reinforced nylon resists fraying and daily wear, especially in high-touch areas. A breathable fabric liner allows heat to escape, reducing overheating risks during extended charging. Lab tests show units with mesh ventilation maintain internal temps up to 15°F cooler than sealed enclosures. Look for certifications like OEKO-TEX or ASTM F963, which signal safer, longer-lasting materials. However, avoid overly thick fabrics-they limit airflow. Also, note that even durable materials degrade under direct sunlight, so placement matters. Consider a one-year warranty as a minimum benchmark. This balance of airflow and ruggedness pays off-especially if you charge multiple devices nightly.
On a final note
You’ll cut clutter and charge smarter with a centralized nook, especially if you use ventilated compartments that prevent device overheating during long sessions. Solid plywood shelves with mesh backing offer airflow and durability. Just make sure your power strip has built-in surge protection and enough USB-A/C ports-ideally 4+ outlets and 3+ ports. Beware of cheap plastics; they warp over time. Test fit larger tablets before final assembly.