Designing Custom Wooden Enclosures With Hidden Push-Latch Compartments for Small Devices
Use maple, walnut, or Baltic birch plywood for a strong, stable enclosure that hides seams when milled precisely. You’ll need a digital caliper, sharp chisels, and a router with a ¼-inch guide bushing to achieve clean, gap-free joints. Install the push-latch mechanism early, routing a shallow recess and using epoxy for lasting hold. Box joints or dovetails add durability, but acclimate wood for 48 hours to prevent warping. Finish with water-based dye and satin wipe-on poly for a seamless look-keep testing on scraps under office lighting to match grain. The finer details reveal how small choices impact performance.
Notable Insights
- Use hardwoods like maple or Baltic birch plywood for strength, stability, and seamless grain matching.
- Employ precise joinery such as dovetails or box joints for durable, gap-free construction.
- Install push-latch mechanisms with shallow routed recesses and epoxy-bonded metal components.
- Calibrate tools like digital calipers and squares to ensure accurate, gap-free assembly.
- Finish with dye and satin wipe-on polyurethane to conceal seams and blend compartment edges.
Pick the Best Wood for a Seamless Push-Latch Compartment
Strength, stability, and fine grain-those are the hallmarks of the best woods for a seamless push-latch compartment. You’ll want to choose hardwoods like maple, walnut, or birch plywood when building hidden compartments; they offer excellent moisture resistance and respond well to precise joinery. Grain matching matters more than you might think-aligning the pattern across the compartment’s face keeps the reveal nearly invisible. Maple, in particular, takes a fine finish and hides mechanisms when sanded smooth. While solid wood can warp with humidity shifts, high-quality Baltic birch ply offers better dimensional stability and strong moisture resistance. Avoid softwoods like pine; they dent easily and lack the fine grain needed for clean, flush latching. Even with ideal materials, perfect alignment depends on flat milling and consistent thickness. Your success hinges as much on material choice as on attention to detail during fit and finish. Top picks for desk woods like hardwood plywood also excel in concealed compartment builds due to their durability and smooth surface.
Gather Essential Tools for Precision Build
While you can manage a basic build with minimal tools, getting a push-latch compartment to open smoothly and stay flush demands a carefully selected set of precision equipment. You’ll need a digital caliper, sharp chisels, a fine-tooth dovetail saw, and a reliable router with a ¼-inch guide bushing for clean, repeatable cuts. A jointer and planer help maintain consistent thickness, especially when accounting for wood grain alignment to prevent warping and guarantee tight seams. Always perform tool calibration checks before starting-misaligned blades or fences lead to gaps that ruin both function and finish. Power sanders save time, but hand sanding gives better control near delicate edges. A digital square guarantees accurate 90-degree angles critical for flush mating surfaces. While high-end tools offer better durability and precision, even mid-range models work if maintained well. Skip calibration at your peril-small errors compound fast in tight-tolerance builds like this.
Build the Push-Latch Mechanism Step by Step
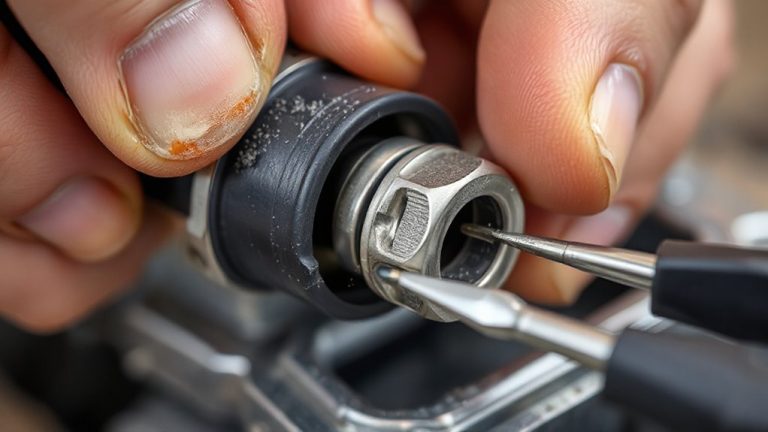
You’ve got your tools dialed in and your stock squared-now it’s time to put that precision to work building the push-latch mechanism itself. Start by routing a shallow recess for the latch plate, ensuring alignment with the compartment’s front edge. The hidden spring is key: compress it slightly when installing so it delivers reliable tactile feedback without overstressing the wood. Too much tension risks warping thin panels, especially in hardwoods like walnut or maple. Below is a quick-reference table for common materials and spring setups:
| Wood Type | Spring Strength | Tactile Feedback Rating |
|---|---|---|
| Cherry | Medium | 4/5 |
| Walnut | Medium-Light | 3.5/5 |
| Maple | Medium | 4/5 |
| Plywood (Birch) | Light | 3/5 |
Use epoxy for metal-to-wood joints-wood glue won’t hold long-term. Test the mechanism early; adjustments are easier pre-assembly.
Assemble the Box With Strong, Clean Joinery
Though clean lines and seamless corners might look effortless, achieving them hinges on choosing the right joint for both structural integrity and visual appeal. You’ll want to use box joints or dovetails-they’re strong and frame your wood selection beautifully. Tight-fitting joints depend on precise cuts, so don’t skip routine tool maintenance: a misaligned blade or dull bit ruins accuracy. Sand edges lightly before assembly to avoid gaps, but don’t overdo it-precision matters more than finish at this stage. Use wood glue and clamps evenly; excess glue can weaken the bond if not cleaned immediately. Remember, even premium hardwoods can warp if stored poorly, so acclimate your stock for 48 hours. Joints only perform as well as their execution allows-measure twice, cut once. This step isn’t flashy, but it’s foundational. Skip shortcuts here, and the rest holds strong.
Add Magnets for Silent, Reliable Activation
If you want the lid to stay securely closed yet open smoothly without noise, embedding small neodymium magnets is a simple upgrade that delivers reliable performance. You’ll get a satisfying silent closure, and the lid won’t rattle loose under vibration or light handling. Just make sure to align the magnetic polarity correctly-opposing poles facing each other-so the magnets attract and seal tightly. Use 6mm x 3mm disc magnets; they’re strong enough to hold without making opening difficult. Install them flush with the wood using a drill press or precise hand drilling to avoid splitting. Test the fit before gluing to confirm alignment and strength. Note: too strong a pull can hinder the push-latch mechanism’s responsiveness, so balance is key. Magnets don’t last forever, but neodymium types retain polarity for years under normal use. No moving parts mean fewer failure points, which helps long-term reliability.
Finish to Hide Seams and Boost the Illusion
While seamless construction starts with precise joinery, a well-chosen finish is what truly hides glue lines and blends wood edges into a unified surface, making hidden compartments nearly undetectable. You’ll want to prioritize wood grain matching when assembling panels-aligning patterns guarantees shadows fall consistently, reducing visual breaks. Apply surface dyeing before any sealant to even out tonal differences between patches; water-based dyes offer precision without raising the grain. Use a pre-stain conditioner if working with softwoods to prevent blotchiness. A satin wipe-on polyurethane seals the surface without adding gloss that might highlight imperfections. Test finishes on scrap pieces first-what looks blended in daylight may stand out under office lighting. While these steps demand time, they’re essential. Skip them, and even perfect joinery won’t sell the illusion. The finish isn’t just protection-it’s the last layer of deception.
On a final note
You’ll love how cleanly this enclosure hides your gear, especially with a hardwood like walnut for tight seams and durability. The push-latch mechanism works reliably, but only if you align it within 1/16 inch during assembly. Adding neodymium magnets guarantees silent closure, though they require precise placement. Always finish with dewaxed shellac before sanding smooth-it seals edges without blushing. Test the latch ten times before final assembly; real-world use demands perfect spring tension.