Maximizing Multitasking Efficiency Using Windows Snap Layouts With Three Monitors
You’ll boost multitasking with three identical 2560×1440 monitors, aligned edge-to-edge and calibrated for consistent brightness and color. Use Windows + arrow keys to snap windows quickly, and pick layouts based on task-side-by-side for coding, grid for multitasking. Customize snap settings per monitor, but remember they don’t sync across devices. For smooth performance, keep desktops clutter-free and scaling consistent; if you’re using 1080p screens, expect tighter column widths. There’s more to get right for seamless workflow across all three displays.
Notable Insights
- Use identical high-resolution monitors (2560×1440 or higher) for consistent, seamless snap layout performance across all three displays.
- Align the center monitor at eye level and angle side monitors to match natural peripheral vision for optimal multitasking comfort.
- Activate Snap Layouts with Windows + arrow keys to quickly arrange windows using keyboard shortcuts and minimize mouse usage.
- Choose layout types-side-by-side, grid, or column-based on task needs and monitor orientation to reduce visual clutter and boost focus.
- Configure Snap Settings individually per monitor to adapt grid layouts and snapping behavior to resolution, orientation, and scaling differences.
Set Up Your Three Monitors for Snap Layouts
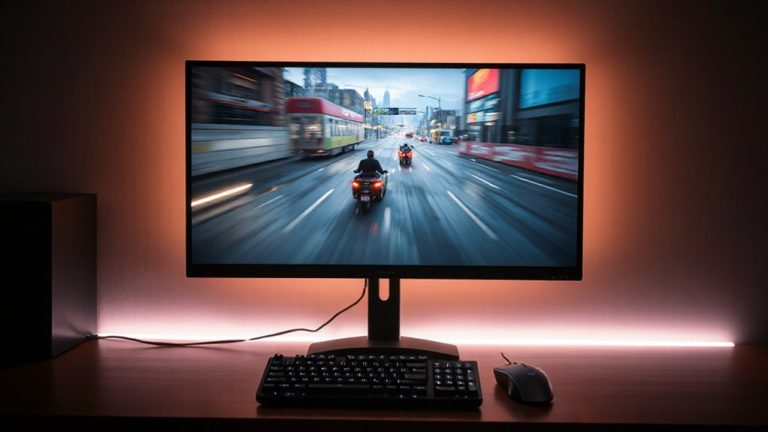
Three monitors can transform your productivity-if set up right. You’ll want identical models for seamless monitor alignment and consistent display resolution, ideally 2560×1440 or higher across all three. Mismatched resolutions cause snapping glitches and visual jarring when dragging windows between screens. Mounting them with bezel-minimized stands reduces eye strain during quick glances. Align the center monitor at eye level and slightly angled toward you; side monitors should follow the natural arc of your vision. Test with text-heavy apps-if lines jump between screens, adjust alignment in Windows Display Settings. Even high-end monitors suffer performance gaps if one runs at 60Hz while others run at 75Hz. You’ll gain screen real estate, yes, but only if timing and resolution sync properly. Mismatches create lag and misfires in Snap Layouts. Calibrate brightness and color temperature together for long sessions. Your setup won’t fix poor ergonomics or distracted work habits. For optimal performance and visual consistency, consider selecting from the best monitors for a triple setup.
Open Snap Layouts Fast on Any Screen
While you can trigger Snap Layouts with a mouse, you’ll get the fastest results using the Windows key plus a directional arrow-this shortcut instantly opens the layout picker on whichever screen your cursor is active, letting you drop windows into place without lifting your hands from the keyboard. It gives you quick access to built-in arrangements across all three monitors, saving time when rearranging complex workflows. If you use custom layouts, remember they must be recreated on each display since Windows doesn’t sync them automatically. The picker adapts to your current monitor’s resolution and orientation, so layouts fit correctly, but uneven screen sizes may cause slight alignment hiccups. For consistent results, keep displays calibrated and drivers updated. This method works best with clutter-free desktops-too many open apps slow down selection. While reliable, it takes practice to snap windows precisely, especially across multiple screens.
Pick the Best Snap Layout for Your Task (Side-by-Side, Grid, or Column)
How do you arrange your apps for the least eye strain and fastest workflow? You’ll want to match your snap layout to your task. For comparing documents or coding, side-by-side window alignment splits the screen evenly-great for focus but tight for complex tools. Need multitasking across several apps? The grid layout supports up to four windows, boosting task organization across monitors without clutter. Columns work best when scanning long pages or timelines, letting you keep email, notes, and browsers vertically stacked. On a 1920×1080 monitor, column width can feel narrow, so reserve it for text-heavy apps. Each layout affects how quickly you switch contexts. Test all three: some boost speed, others add clutter. There’s no universal fix-your ideal setup depends on screen real estate and task complexity. Choose based on what reduces scrolling and keeps key info visible.
Use Keyboard Shortcuts to Snap Windows Faster
You can save seconds every time you resize a window-and those seconds add up. Using keyboard shortcuts instead of dragging windows gives you faster, more precise control. Windows + arrow keys snap apps to sides or corners, while Windows + Ctrl + arrow moves between monitors-key for efficient keyboard navigation. You’ll cut down on mouse dependency and boost workflow rhythm. Most shortcuts can’t be changed natively, but shortcut customization is possible through PowerToys, letting you assign new key combos if needed. While shortcuts take practice, most users see measurable gains within a week. Some might find them finicky at first, especially switching between monitor arrangements. Stick with it, though, and the speed improvements become automatic. Just remember: these are tools, not magic. Your setup matters, but so does consistent use. With deliberate practice, keyboard shortcuts make multitasking feel seamless.
Adjust Snap Settings Per Monitor
Your monitor’s unique resolution and orientation shape how Snap layouts behave, so adjusting settings per display guarantees consistency across your workspace. Proper monitor calibration and display alignment guarantee each screen’s snapping zones respond accurately to your workflow. You’ll want to customize grid layouts based on each monitor’s use-like keeping spreadsheets on a vertical display and web apps on wider screens.
| Monitor | Resolution | Recommended Layout |
|---|---|---|
| Left | 1920×1080 | 2-column stack |
| Center | 2560×1440 | 3-column grid |
| Right | 1920×1200 | 1-column + panel |
Windows lets you set these individually through Display Settings > Snap Windows. While this fine-tuned control boosts precision, misalignment can cause windows to jump or snap incorrectly. Always recheck display alignment after changing scaling. These settings don’t sync across devices, so replicating them on another PC takes manual effort.
Troubleshoot Missing Snap Layouts or Stuck Windows
Ever noticed Snap layouts disappearing when you hover over the maximize button, or windows refusing to release from their snapped position? You’re likely dealing with missing layouts or stuck windows. First, check if you’re using Windows 11 22H2 or later-older versions don’t support three-monitor Snap Layouts. Restart File Explorer via Task Manager; it often brings back missing layouts. If windows stay stuck, drag them manually from the title bar or use Win + Shift + Left/Right to shift displays. Make sure “Snap windows” is enabled in Settings > System > Snap. Some apps, especially full-screen or legacy ones, don’t support snapping, so issues may persist there. Hardware isn’t usually the culprit unless display drivers are outdated-update through Device Manager. While Snap improves multitasking, inconsistent app support means you’ll still need manual adjustments now and then.
On a final note
You’ll boost multitasking across three monitors using Snap Layouts, especially with consistent resolutions and aligned bezels for smoother eye movement. Enable Snap Assist and use *Win+Z* to access layouts fast. While side-by-side and grid views improve workflow, some apps may snap unpredictably. Adjust snap sensitivity per monitor in Settings > System > Snap. Test window behavior across displays-minor misalignment can disrupt precision. Keyboard shortcuts save time, but require practice.