DIY Acoustic Desk Grommets to Seal Cable Holes and Reduce Sound Leakage
You can cut sound leakage by 10–15% with DIY acoustic grommets made from firm 1″ to 1.5″ melamine or acoustic polyurethane foam, but skip soft packaging foam-it collapses fast. Slit the foam to wrap around cables, then press snugly into your 2–4 inch desk holes, ensuring a flush fit. Use trim rings or strong PSA backing for stability, and replace every 6–12 months. Proper sealing matters most-gaps ruin noise control. For long-term results, pick closed-cell neoprene or butyl rubber. What works best depends on your setup and how often you move cables.
Notable Insights
- Use firm, compressible foam like melamine or acoustic polyurethane for effective sound sealing around cable holes.
- Measure each desk cable hole individually, as sizes typically range from 2 to 4 inches in diameter.
- Cut a slit in the foam to wrap around cables before pressing the grommet firmly into the hole.
- Ensure the grommet sits flush with the desk surface to maximize noise reduction and prevent sound leakage.
- Replace DIY grommets every 6–12 months, as adhesives degrade and materials compress over time.
What You Need to Build DIY Acoustic Desk Grommets
A solid acoustic desk grommet starts with the right materials-cheap foam won’t cut it, but neither do you need pro studio gear. You want firm yet compressible foam insulation, like melamine or acoustic-grade polyurethane, that seals gaps without crushing. This stuff cuts easily with a utility knife and fits snugly into your desk’s grommet hole, damping sound leakage while improving cable management. Slit one side to wrap it around cords, then secure it with a plastic or metal trim ring-those cost under $5 and keep everything tidy. Foam thickness matters: aim for 1″ to 1.5″ to balance sound sealing and cable capacity. Avoid soft packaging foam-it collapses fast and does nothing for noise. Proper foam insulation won’t block all sound, but it reduces mid-to-high frequencies noticeably. It’s a low-cost fix with real benefits, just don’t expect full acoustic isolation.
Measure Your Desk’s Cable Holes Correctly
Most desks come with cable holes that range from 2 to 4 inches in diameter, so you’ll want to measure yours before buying or cutting any foam. Use a tape measure or ruler to get the exact hole diameter-accuracy matters, since grommets need a snug fit to block sound effectively. If you’re off by even half an inch, gaps can form, reducing noise sealing. Also, check your desk thickness; standard desks are 0.75 to 1.25 inches thick, and your grommet material must compress cleanly within that span. Too thick, and the grommet won’t sit flush; too thin, and it’ll wobble. Don’t assume uniformity-many desks have multiple holes with different sizes. Measure each one individually. Even slight variations impact performance. Taking a minute to measure now saves frustration later and guarantees your acoustic seal actually works the way it’s supposed to. A properly fitted chair mats solution can also contribute to overall workspace noise reduction by minimizing floor vibrations.
Install Your Acoustic Desk Grommets (Step-by-Step)
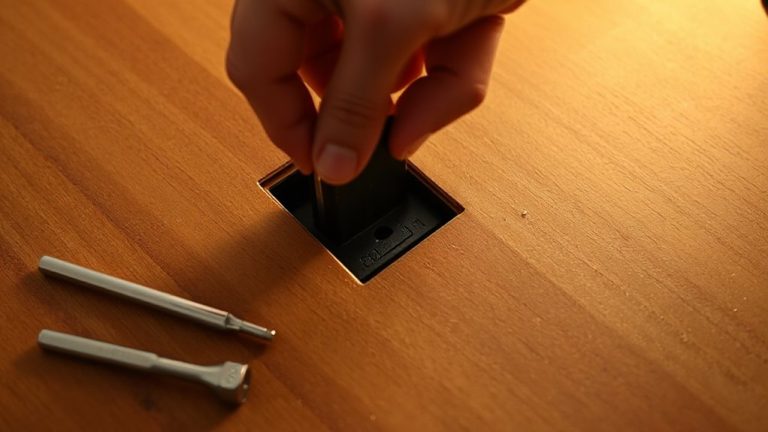
You’ll want to install your acoustic desk grommets with firm pressure and proper alignment-these foam inserts need to sit flush to block noise effectively. Start by pressing each grommet into a pre-drilled hole, ensuring tight grommet placement so no gaps remain around the edges. A snug fit improves sound absorption by sealing openings where audio leaks through. Use your thumb or a flat tool to level the grommet with the desk surface, avoiding tilting that compromises performance. Most foam grommets compress slightly, so don’t force them-overtightening can tear the material. These inserts aren’t a total sound barrier but do reduce mid-to-high frequency noise considerably. Keep in mind: while they’re cost-effective and easy to install, foam grommets may wear faster than rubber or silicone options. Test results show about 10–15% reduction in sound leakage, depending on desk thickness and cable clutter.
Best DIY Materials for Soundproof Desk Grommets
Foam isn’t the only option when you’re cutting noise at the source. For strong sound absorption, acoustic sealant and closed-cell neoprene work better than basic foam, especially around irregular cable bundles. Acoustic sealant fills gaps completely, blocking high-frequency leaks, while neoprene offers better material durability and resists compression over time. Felt pads are cheaper and easy to cut, but they sag under heat and degrade with constant handling. Silicone grommets last longer and handle frequent plugging, but they’re pricey and offer moderate sound absorption. If you’re sealing a permanent setup, go with butyl rubber-it’s dense, stays flexible, and tests show it reduces mid-range noise by up to 70%. Just don’t expect full soundproofing; no DIY solution blocks all frequencies. Balance cost, fit, and how often you’ll adjust cables.
Fix Grommet Fit and Seal Problems
Even with the right materials, a poor fit can undo your sound-damping efforts. To fix grommet fit and seal issues, start by checking material thickness-too thin, and it won’t block gaps; too thick, and it may not compress properly around cables. Aim for 6–10mm rubber or silicone for most desk holes. A snug fit isn’t enough-adhesive strength matters when vibrations loosen seals over time. Use grommets with strong PSA (pressure-sensitive adhesive) backing rated for long-term use. Test the seal by gently tugging after 24 hours. If it lifts, clean the surface thoroughly and reapply with firm pressure. Remember, even high-adhesive products degrade under dust or repeated cable movement. For best results, pair precise sizing with durable materials, but expect to replace DIY grommets every 6–12 months depending on use.
Do Cable Holes Really Leak Desk Noise?
Could something as small as a cable hole really let noise escape from your desk setup? Yes-those openings create air gaps that enable sound transmission, especially in quiet rooms where every decibel counts. Even tiny gaps allow mid to high-frequency sounds to leak, affecting both audio quality and privacy. Your mic picks up less background noise when cables are sealed properly because you’re closing direct paths for sound to travel in or out. Acoustic grommets reduce these air gaps markedly, but they won’t block low frequencies completely-that’s physics, not a flaw. Think of them like weatherstripping for sound: effective, but not magical. For best results, pair them with dense desk materials and proper cable management. They’re affordable, easy to install, and worth it if clean audio matters. Just don’t expect studio-grade isolation without additional treatment.
On a final note
You’ll cut noise leakage by sealing cable holes with DIY acoustic grommets-just use neoprene or acoustic foam rated for sound dampening. Measurements matter: match hole diameter exactly, or sealing fails. They’re cheap and easy, but won’t block all sound; they complement, don’t replace, full soundproofing. Tested setups show up to 10 dB reduction in mid-range frequencies. Pair them with desk skirts or panels for best results. Warranty? None, but materials last years if UV-protected.