How to Optimize Windows 11 for Dual Monitor Productivity in a Home Office
You’ll boost productivity by setting up extended displays in Windows 11 with HDMI or DisplayPort, then arranging them in Display Settings to match your physical layout. Use Snap Layouts (Win + Z) on both screens for efficient window management, but expect minor quirks with apps at different scaling levels. Match each monitor’s resolution and scaling to its native specs-125% or 150% scaling often balances comfort and space. Disable “Show taskbar on all displays” to reduce clutter, and use Win + Shift + Arrow keys to move apps smoothly between monitors. You’ll find finer adjustments can further refine your workflow.
Notable Insights
- Connect monitors using HDMI or DisplayPort and arrange displays in Settings to match physical layout.
- Align monitor tops at or slightly below eye level using arms or stands for ergonomic comfort.
- Set each monitor to native resolution and recommended scaling to balance clarity and screen space.
- Enable Snap Layouts with “Win + Z” to quickly organize windows across both screens for multitasking.
- Disable taskbar duplication and use Win + Shift + Arrow shortcuts to manage apps efficiently between monitors.
Connect and Arrange Dual Monitors in Windows 11
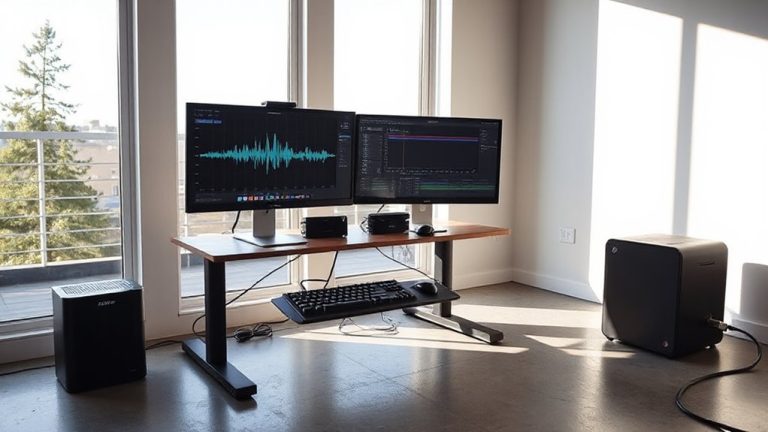
While your laptop screen gets the job done, adding a second monitor can genuinely boost your productivity-if set up right. Start by connecting your monitors using HDMI or DisplayPort cables, ensuring your GPU supports dual outputs. Once detected, go to Display Settings to drag and arrange screens to match their physical layout-this avoids mouse confusion. Proper ergonomic positioning matters: align the top of both screens at or slightly below eye level, about an arm’s length away. Use monitor arms or stands to achieve this. Tidy cable management isn’t just about looks; it reduces clutter and tripping hazards. Route cables through sleeves or under-desk trays. Keep power, video, and USB lines separated to prevent interference. Poor setup can cause neck strain or desk congestion, so take time to adjust angles and spacing. A well-placed second monitor helps, but only if the ergonomics and wiring support real, daily use. For prolonged comfort during long work sessions, consider pairing your setup with one of the top Amazon office chairs for both comfort & style.
Use Snap Layouts on Both Screens for Faster Multitasking
Snap Layouts in Windows 11 let you quickly organize multiple apps across both monitors with precision, turning cluttered desktops into efficient workspaces. You’ll benefit from Snap alignment, which auto-sizes windows when dragged to screen edges or corners, making it easy to place apps exactly where they’re needed. Both screens support Layout switching, so you can toggle between common arrangements-like two docs side-by-side or a video call next to a browser-without manual resizing. This speeds up multitasking, especially when managing communication, reference material, and productivity tools at once. While the system works reliably, some apps may resist resizing or misalign slightly due to non-standard window scaling. Layout switching also takes brief adjustments when moving apps between monitors with differing aspect ratios. Use the taskbar’s Snap icon or “Win + Z” shortcut for quickest access. With practice, Snap Layouts become intuitive, but expect a short learning curve.
Adjust Resolution and Scaling Per Monitor
To get the sharpest text and most comfortable workspace, you’ll want to adjust the resolution and scaling settings individually for each monitor. Windows 11 lets you set each display to its native resolution, ensuring crisp visuals and correct aspect ratios. Matching the recommended scaling-like 100%, 125%, or 150%-reduces eye strain and keeps UI elements consistent across screens. Don’t assume identical monitors have identical needs; slight differences in size or panel type mean separate calibration helps. Use built-in color calibration tools to align hues and brightness, improving visual continuity. Also, confirm both monitors run at their ideal refresh rate-60Hz or higher-especially if you notice lag or flicker during motion. While higher scaling simplifies readability, it may shrink usable screen space. Test different combinations to balance clarity, comfort, and productivity. These tweaks take minutes but markedly impact daily efficiency-just remember, mismatched settings can distort more than enhance.
Show Taskbar Apps on Primary Screen Only
Ever wonder why your taskbar gets cluttered with duplicate app icons across both monitors? You can fix this through taskbar customization by setting apps to show only on the primary screen. Go to Settings > Personalization > Taskbar, then disable “Show taskbar on all displays” or adjust “Taskbar behaviors” to consolidate app buttons. This change streamlines application behavior, reducing visual noise and improving focus. It’s ideal when your secondary monitor is for reference or media, not active multitasking. But keep in mind, you’ll need to manually switch focus to launch apps on the second screen. While this setup enhances clarity on your main display, it might slow down workflows if you regularly open programs across both monitors. Test it for a few work sessions-some users regain focus, while others find it restrictive. Results depend on your habits and screen roles.
Move Apps and Virtual Desktops Between Monitors
You’ve cleaned up the clutter by showing apps on your primary taskbar only, but now you need to move those apps freely between screens-especially when switching tasks or reorganizing your workflow. Drag windows directly by their title bar to any monitor; Windows 11 remembers their position, making multitasking smoother. Use Task View (Win + Tab) to shift virtual desktops between displays-great for separating work and personal tasks. Keep in mind that monitor mirroring disables extended desktop features, so disable it unless presenting. App pinning works only on the primary taskbar if set, so pinned apps won’t show on secondary screens, which limits quick access if monitors are swapped. Moving apps between monitors doesn’t auto-move pinned shortcuts-adjust taskbar settings or use keyboard shortcuts (Win + Shift + Left/Right) for better control. This setup improves efficiency but requires minor habit adjustments.
Set Different Sleep Timers for Each Monitor
| Feature | Limitation |
|---|---|
| Custom per-monitor sleep | Requires third-party software |
| Immediate power-down option | No native scheduler per display |
| Works with display detection | Slight delay in activation |
| Compatible with most GPUs | May interfere with system updates |
You’ll retain flexibility, but monitor settings via power options remain system-wide by default. Test stability before relying on automation-some tools aren’t signed, which may trigger security warnings.
On a final note
You’ll boost productivity by using both monitors effectively, especially with Snap Layouts and proper scaling on each display. Just remember, extending virtual desktops across screens can get messy if you’re not disciplined. Set sleep timers wisely-save power without killing your workflow. And keep taskbar clutter minimal by showing apps on the primary only. It works well, but tweak settings as needed; every setup has trade-offs between convenience and control.