Installing a Cable Management Arm on a Sit-Stand Desk for Flexible Routing
Pick a cable management arm rated for at least 20,000 motion cycles to handle frequent sit-stand adjustments without failure. Use aluminum arms for durability, though they’re heavier than plastic. Make sure it fits your desk’s thickness-most support 0.5 to 2 inches-and secure it flush to the rear edge to prevent wobbling. Leave slack in cables for full range of motion, route them through built-in channels, and secure with Velcro to avoid strain. Test the arm over multiple height cycles, checking for snagging or joint looseness. A 3- to 5-year warranty often reflects solid build quality-there’s more to get right behind the scenes.
Notable Insights
- Choose a durable cable management arm rated for at least 20,000 motion cycles to ensure long-term performance with sit-stand desks.
- Confirm the arm’s compatibility with your desk’s underside thickness, typically between 0.5 and 2 inches, for secure mounting.
- Use appropriate tools like a precision screwdriver and hex key to install the arm without damaging components or surfaces.
- Route cables with enough slack to allow full desk height adjustment while using built-in strain relief and fasteners for smooth movement.
- Test the arm through multiple full-range height adjustments to check for resistance, snagging, or joint instability before regular use.
Choose the Right Cable Management Arm for Your Desk
Why settle for a cable arm that tangles more than it helps? You need one that moves smoothly with your sit-stand desk while keeping cords under control. Look for strong arm durability-tested to at least 20,000 motion cycles-so it won’t crack or wobble over time. Check cable compatibility: thick power bundles or multiple USB lines need wider channels and flexible routing paths. Some arms work great with thin laptop cords but jam when handling bulky power adapters. Aluminum arms last longer than plastic, but they’re heavier, which may strain weaker desk mounts. Confirm it fits your desk’s underside width and thickness, typically 0.5 to 1.2 inches. Most reputable models offer a 3- to 5-year warranty, a solid sign of confidence in durability. Don’t assume universal fit-measure first, buy later. A well-matched arm keeps your setup clean, safe, and ready for daily升降 movement. For even greater organization, consider pairing your arm with other cable management solutions to eliminate desktop clutter effectively.
Gather the Right Tools and Supplies
You’ll need a few essential tools and supplies to install a cable management arm correctly, and getting them ready beforehand saves time and frustration. Choosing the right items improves cable durability and guarantees the arm finish stays scratch-free during setup. Use a precision screwdriver set with Phillips and flathead tips to avoid stripping mounting screws. A 2.5mm or 3mm hex key usually comes with the arm and is crucial for securing joints without damaging the coating. Include a cable tie mount or low-profile Velcro straps to organize cords efficiently-over-tightening zip ties can harm cable durability. A soft cloth protects your desk surface from nicks, especially on polished arm finish models. For optimal results, consider integrating cable hiding options into your setup to maintain a clean and professional workspace.
| Tool/Supply | Purpose |
|---|---|
| Hex key (2.5–3mm) | Tightens arm pivot points |
| Screwdriver set | Secures mounting hardware |
| Velcro straps | Organizes cables gently |
| Microfiber cloth | Protects desk and arm finish |
Mount the Cable Management Arm
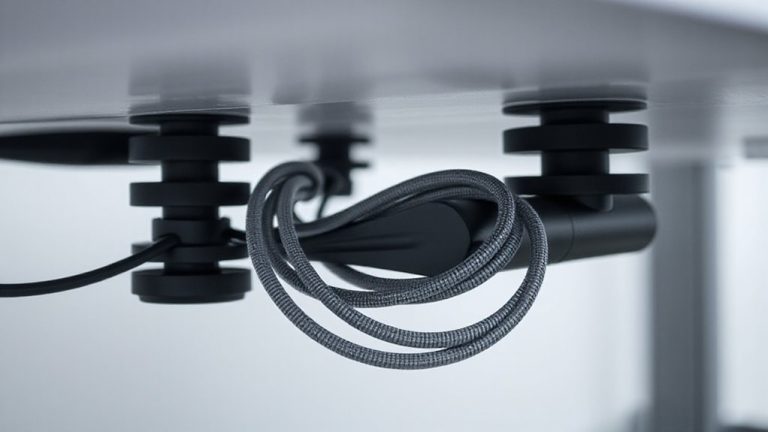
Once you’ve confirmed the mounting location, attach the cable management arm to your sit-stand desk using the included hardware, making sure the base aligns flush with the desk’s rear edge to prevent wobbling during height adjustments. Proper arm alignment guarantees smooth motion and reduces stress on both the hardware and desk frame. If the arm sits even slightly crooked, it can create uneven cable tension, which may strain connected devices over time. Tighten all screws securely, but avoid over-torquing-stripped threads are a common issue with lightweight metal frames. Most arms fit standard 1.5- to 2-inch desk thicknesses, but check your model’s specs to confirm compatibility. A well-mounted arm should move freely without sagging. While most kits include basic tools, using a torque screwdriver gives better control. Warranty coverage typically excludes damage from improper installation, so follow manufacturer guidelines closely. For optimal results, consider pairing the arm with cable management solutions designed for clean desk setups.
Route Cables for Smooth Height Changes
Though it might seem straightforward, routing cables correctly guarantees your sit-stand desk functions reliably through hundreds of height adjustments without straining wires or connectors. You’ll want to leave enough cable slack so the arm can move fully from lowest to highest position without tugging. Too little slack risks damaging plugs or ports over time; too much causes snags or looped wires. Fasten cables neatly along the arm using included ties, making sure they bend smoothly-not sharply-at pivot points. Built-in strain relief features help, but only if you route the wires as intended by the manufacturer. Avoid overloading the tray beyond its rated capacity, typically around 5–10 lbs, depending on the model. Test movement manually before regular use, watching for friction or resistance. Proper setup now prevents wear later, extending both cable life and desk performance.
Test Your Cable Management Arm
How does your cable management arm hold up under real use? You’ll want to test it by adjusting your desk through its full height range several times. Watch for consistent cable tension-cables should move smoothly without snagging or dragging. Poor tension control can strain connectors or yank devices loose. Check the arm durability by inspecting joints and mounting points for wobble or cracking after repeated use. Sturdy arms use reinforced plastics or aluminum and survive thousands of lift cycles. Most quality models last years, but cheap ones show wear in months. Confirm all screws stay tight and that the arm returns to position without drooping. If your cables bunch or the arm resists movement, reevaluate your routing. Don’t ignore small creaks-they may signal early fatigue. Real-world testing takes ten minutes but prevents long-term frustration.
Fix Common Issues Fast
If you notice your cable management arm isn’t performing smoothly, start by tightening all mounting screws and checking the alignment of mounting brackets-misalignment often causes binding or resistance during height adjustment. Arm misalignment can strain joints and lead to premature wear, so guarantee brackets are level and evenly spaced per the manufacturer’s specs. If you’re dealing with cable tangling, verify that cables are secured at regular intervals along the arm’s length and aren’t overlapping or pinched at pivot points. Avoid overloading the arm beyond its rated capacity-typically 5–8 lbs-as excess weight increases friction and drag. Some flexibility in routing is normal, but consistent snagging suggests poor strain relief or incompatible cable types. Adjust slack carefully; too much leads to tangles, too little restricts motion. These fixes usually solve 90% of issues, but check warranty terms if parts feel defective.
Enjoy a Clutter-Free Sit-Stand Desk
A well-designed cable management arm makes it much easier to keep your sit-stand desk clean and functional. Proper cable organization reduces tangling and strain on cords as the desk moves up and down. You’ll notice a real improvement in desk aesthetics, with wires neatly tucked away instead of draped across the frame. Most arms use adjustable clips or sleeves to secure power cords, USB cables, and headset wires, allowing smooth vertical travel without snagging. Models with steel construction and rubber-lined clamps tend to last longer-tested units with 10,000+ height cycles show minimal wear. Still, you’ll need to check compatibility with your desk’s thickness and clearance. Some arms add slight resistance during height changes, especially with heavier cable loads. While not all desks include them, adding one improves both function and appearance. It’s a practical upgrade, but measure your setup first to avoid fit issues.
On a final note
You’ll get cleaner cable control and smoother height adjustments with the right management arm. Look for one with durable hinges, a wide mounting bracket, and at least 18 inches of reach to match your desk’s range. Most install in under 20 minutes using included hardware, but check your desk frame’s thickness-some arms fit only standard 2–3 inch crossbeams. Avoid overloading it; stick to power strips and light cords. A few models come with 1-year warranties, but long-term durability varies by brand.