The Role of Lighting in Projecting Professionalism During Video Calls
Good lighting makes you look professional by clearly showing your face and expressions, but it doesn’t need to cost much. Aim for 300–500 lux with a 4000K color temperature to stay neutral and clear. Position your main light-like a $40 ring light or a window-slightly above eye level and 45 degrees in front to cut shadows. Avoid backlighting or overhead bulbs that cause glare or silhouettes. Even natural light works if diffused by a sheer curtain. You’ll learn how small tweaks can fix common issues fast.
Notable Insights
- Good lighting enhances professionalism by clearly illuminating facial features and minimizing distracting shadows.
- Position the main light source at a 45-degree angle and slightly above eye level for optimal facial clarity.
- Use natural light from a front-facing window with a sheer curtain to soften brightness and reduce harsh contrasts.
- Aim for 300–500 lux and a color temperature near 4000K to balance warmth, clarity, and visual comfort.
- Avoid backlighting and overhead lights to prevent silhouetting, glare, and unflattering shadows during video calls.
Why Video Call Lighting Shapes First Impressions

Ever wonder why some people look sharp and engaged on video calls while others seem washed out or shadowy? It’s largely because lighting directly shapes first impressions, and you’re likely being judged within seconds. Good lighting improves video aesthetics by guaranteeing your face is evenly illuminated, reducing harsh shadows and glare. A well-lit face with proper background contrast helps you stand out clearly from your surroundings-avoiding a flat or cluttered look. Natural light from a window in front of you often works, but if you’re backlit, your camera struggles. A simple desk lamp or a softbox at 45 degrees to your face can help. While ring lights boost clarity, overuse can flatten features. There’s no need for expensive gear-positioning matters more. Just guarantee the brightness doesn’t exceed 800 lumens to prevent glare. Test angles under actual call conditions. For budget-friendly yet effective options, consider best budget lights that deliver professional-looking results without breaking the bank.
How Bad Lighting Hurts Your Professional Image

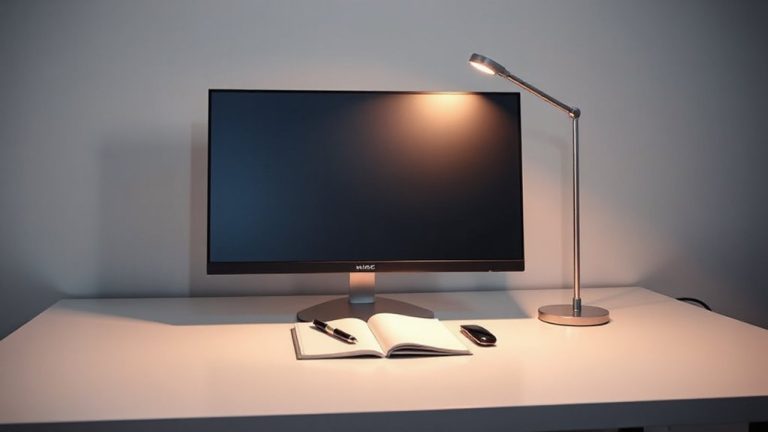
Poor lighting doesn’t just dim your appearance-it actively works against your credibility. When you’re stuck in dim surroundings, your face fades, making it harder for others to read your expressions and trust your message. Harsh shadows carve deep lines across your face, especially under overhead lights or a single desk lamp, giving a distracted or even untrustworthy impression. These flaws don’t just distract-they shape how seriously people take you. Video calls rely on visual cues, and bad lighting disrupts that connection. You don’t need a studio setup, but placement matters: avoid backlighting from windows and skip bare bulbs that create glare. Natural light near a window often works, but test it midday. Even budget ring lights (3000–5000K color temperature) can help if positioned at eye level. Just don’t overdo brightness-soft, even light wins. Real-world tests show consistent results with diffused sources. For targeted solutions, consider a best desk lamp for video calls that combines adjustable brightness and color temperature control.
Best Lighting Setup: Brightness, Color, and Angles

While you don’t need professional gear to look credible on camera, getting the basics of brightness, color temperature, and light placement right makes a measurable difference. Aim for 300–500 lux of brightness-enough to clarify facial features without glare. Use a light temperature around 4000K; it’s neutral, balancing warmth and clarity without looking clinical. Too warm (below 3500K) feels dim or cozy, while above 5000K can wash you out. Angling your light at 45 degrees above and slightly in front of you improves shadow control, softening harsh lines under eyes or chin. Avoid overhead or back lighting-it creates contrast issues. Natural light from a front-facing window works well if you diffuse it with a sheer curtain. You don’t need a ring light, but if you use one, pick a dimmable model. Most last 50,000 hours, but check warranty length-cheap ones flicker under camera. For added comfort during long calls, consider pairing your setup with a yoga ball chair to promote active sitting and improve posture.
Face Your Light Right: Positioning Tips for Clarity
When you position your light correctly, you’re far more likely to look alert and be seen clearly on camera without distractions from shadows or glare. Aim your main light source slightly above eye level and in front of you-this light direction minimizes shadows while enhancing facial contrast just enough to define your features. Avoid placing lights behind you, as that creates silhouettes and forces the camera to overexpose your surroundings. Positioning a light directly overhead or too low causes harsh shadows and reduces clarity. For balanced results, use a softbox or diffused lamp at a 45-degree angle to your face. This setup works well even if your space is tight or your background is busy. Keep in mind, though, if your lighting isn’t adjustable, you’ll need to move yourself to find the best spot. Good positioning doesn’t require gear-just attention to how light shapes what others see.
Easy Budget Upgrades for Better Video Lighting
A solid lighting upgrade doesn’t have to cost hundreds-you can get dramatically better video quality with a few strategic, budget-friendly swaps. Positioning yourself near natural light is free and effective, but it’s inconsistent. Ring lights offer diffused, even illumination and typically cost under $50. They’re easy to set up, USB-powered, and work well in dim environments. Below is a comparison of top budget options:
| Product | Price Range |
|---|---|
| Neewer 10″ Ring Light | $40–$50 |
| UBeesize 18″ Ring Light | $35–$45 |
| Natural light (window setup) | $0 |
| Aperture Desk Lamp (LED) | $60–$70 |
| SmallRig 10″ Bi-Color | $80–$90 |
Ring lights beat shadows and blend well with ambient light, but cheaper models flicker on camera. Natural light works best in the morning or midday and requires no power-but causes glare if uncontrolled. Choose based on your room and schedule.
3 Common Home Office Lighting Mistakes to Fix
You’re probably making at least one lighting mistake in your home office that’s undermining even the best budget upgrades. Placing lights behind you creates harsh shadows, while overhead bulbs often cause glare reduction issues on screens and unflattering facial contrast. For effective shadow control, position your key light at a 45-degree angle in front of you and slightly above eye level. Avoid windows directly behind or to the side unless they’re diffused-otherwise, you’ll look backlit and indistinct. Many desk lamps create uneven pools of light or excessive brightness on reflective surfaces, so check beam angles and use softboxes or diffusers. While LED panels offer reliable color temperature control, some models overheat without proper ventilation. Even the best fixtures fail if poorly placed, so prioritize placement over power. Test angles during your typical meeting times to catch shifting sunlight problems.
Lighting Hacks for Any Room and Time of Day
How can you maintain a professional appearance on video calls no matter where you’re sitting or what time it is? Use natural light when possible-it’s flattering and balanced. Face a window for even illumination, but avoid direct sun to prevent harsh highlights. When daylight fades, manage room ambiance with adjustable LED panels or ring lights. Position them slightly above eye level and 2–3 feet away for a natural look. Avoid overhead lighting, which casts unflattering shadows. Here’s how common setups compare:
| Light Source | Color Temp (K) | Impact on Room Ambiance |
|---|---|---|
| North-facing window | 5500–6500 | Consistent, soft natural light |
| Desk lamp (LED) | 3000–4000 | Warm but may yellow skin |
| Ring light | 5600 | Bright, clinical if overused |
| Floor lamp + shade | 2700–3500 | Cozy, too dim for video |
| Backlight | Any | Creates silhouette-avoid |
Always test your setup first. Natural light changes; artificial lights need positioning care.
On a final note
Good lighting boosts your professionalism on video calls, but you don’t need expensive gear. Position a bright, daylight-balanced (5000K) lamp at 45 degrees in front of you to evenly illuminate your face. Avoid backlights or overhead fluorescents-they cast harsh shadows or wash you out. Natural light works well during daytime, but use sheer curtains to soften direct sun. A $20 LED panel with adjustable brightness gives control when needed. Just make sure it’s diffused to prevent glare on glasses.