Installing Resilient Channels to Decouple Drywall and Improve Sound Isolation
You should install resilient channels to decouple drywall and boost sound isolation by 10–15 STC points, using cold-rolled steel ones spaced at 16 inches for best results. Mount them perpendicular to studs or joists, and never let screws touch framing-this kills the decoupling. On ceilings, support channels every 48 inches and align them with a laser. Avoid over-tightening screws or misalignment, as even small errors create sound bridges that ruin performance-check for gaps and test with decibel measurements to confirm. You’ll want to get every detail right for real-world noise control that actually works.
Notable Insights
- Install resilient channels perpendicular to studs or joists to break sound transmission paths effectively.
- Use cold-rolled steel channels for durability, better screw retention, and optimal sound isolation performance.
- Space channels at 16-inch intervals for maximum support and to minimize flanking sound transfer.
- Avoid over-tightening drywall screws to prevent creating rigid connections that compromise decoupling.
- Seal all gaps, seams, and electrical boxes with acoustic caulk to eliminate air leaks and maintain sound integrity.
What Are Resilient Channels and How Do They Stop Sound?
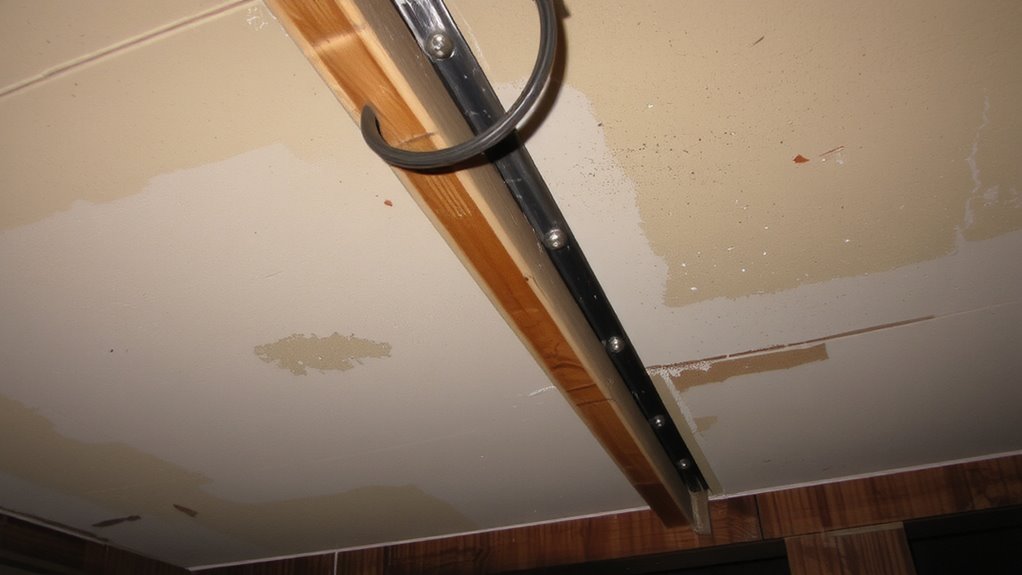
Resilient channels-those thin, metal strips designed to decouple drywall from wall or ceiling framing-are a go-to for reducing sound transfer in home offices and shared walls. You’ll install them perpendicular to studs, creating a flexible gap that disrupts sound paths. This design boosts vibration damping, stopping structure-borne noise like voices or music from traveling through framing. Pair the channels with acoustic insulation in the cavity, and you’ll see a noticeable drop in sound transmission-especially mid to low frequencies. Real-world tests show STC ratings can jump by 10–15 points when done right. But success hinges on proper installation: any screw touching the stud ruins the decoupling effect. These channels aren’t a magic fix-ceilings are trickier, and cheap metal may flex too much. Use brand-name products like RC-1 with a solid warranty, and avoid over-tightening fasteners. Done well, they deliver clear acoustic gains without major renovation.
How Decoupling Walls Reduces Noise Transfer
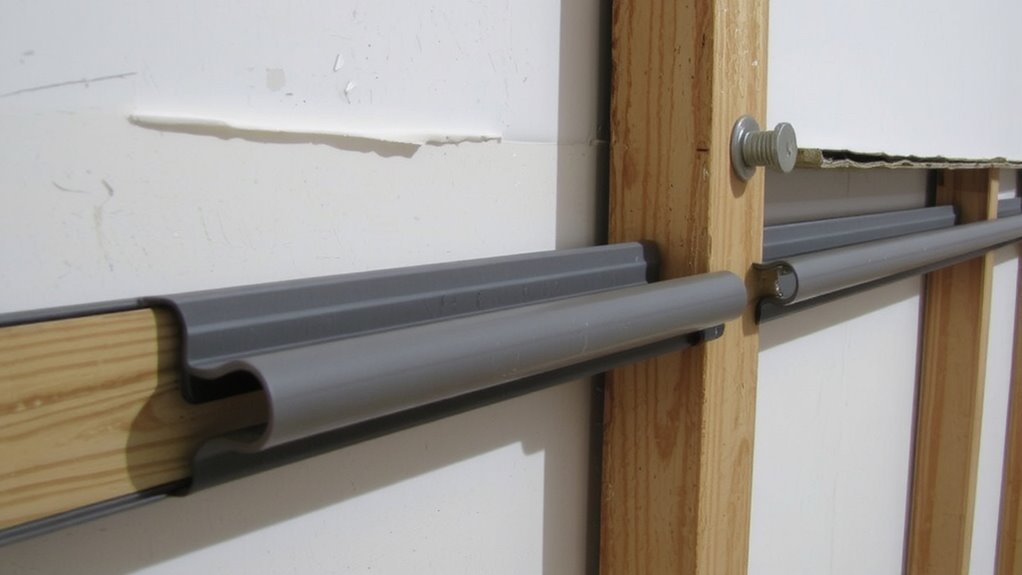
You get better noise control when you break the direct path sound takes through walls, and that’s exactly what decoupling does. By separating drywall from the studs using resilient channels, you minimize structural vibrations that carry sound. This setup boosts vibration damping, preventing noise from easily jumping between rooms. While sound absorption materials like insulation help reduce airborne noise, decoupling specifically tackles structure-borne sound-like footsteps or music vibrations-that standard drywall transmits well. Performance improves noticeably, often increasing STC ratings by 10 or more points in real-world installations. But results depend on proper installation: any screws touching the channel flange or misaligned framing can short-circuit the system. You’ll need to mind electrical boxes, seams, and wall penetrations, since gaps undermine isolation. It’s effective, but not foolproof. Done right, it’s one of the most cost-effective upgrades for noise control in shared walls-just don’t skip the details.
Choose the Right Resilient Channel for Your Room
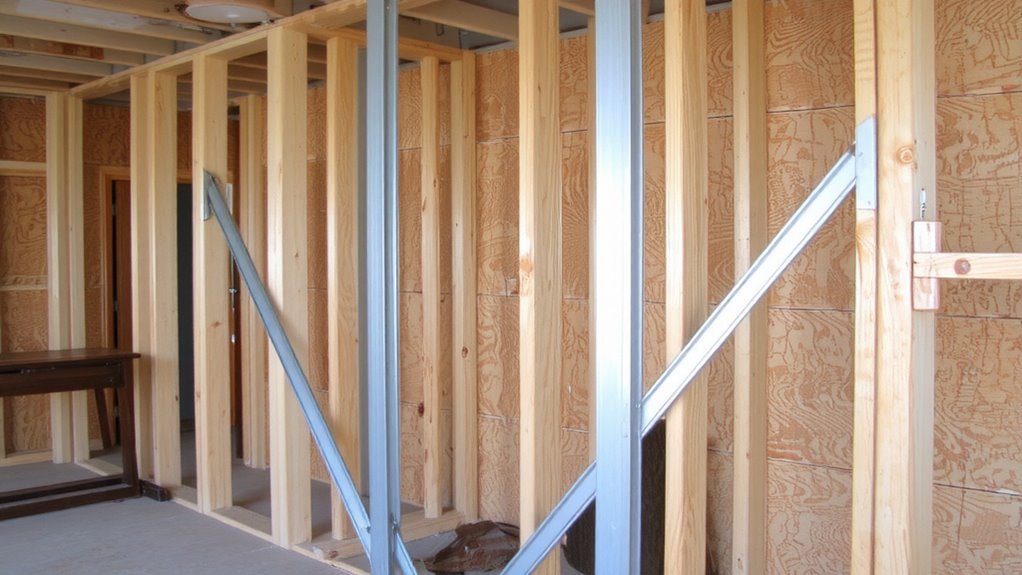
When it comes to blocking noise in your home office or shared wall, not all resilient channels perform the same-your choice directly impacts sound isolation and installation ease. Steel channels typically outperform vinyl due to higher stiffness and consistent geometry, making them better for serious sound decoupling. Your material selection matters: cold-rolled steel resists warping and holds screws better, while some composite channels may compress over time. For best performance, follow a strict 16-inch channel spacing, aligned perpendicular to studs-this maximizes support and minimizes flanking paths. Tight spacing adds cost but improves deflection ratings. Avoid cheap, thin-gauge channels; they bend under drywall weight, reducing STC ratings by up to 5 points in lab tests. Always verify manufacturer specs for load capacity and compatibility with your wall assembly. Properly installed steel channels can boost wall STC by 10–15, but only if chosen and spaced correctly.
Install Resilient Channels on Walls
A properly installed resilient channel system can make a noticeable difference in reducing noise transfer through walls, especially in home offices or shared living spaces where sound privacy matters. You should mount the channels vertically, perpendicular to the studs, using screws that don’t over-tighten-this preserves the decoupling effect. Proper wall alignment is critical; if the channels aren’t level, your drywall may sit unevenly, leading to gaps or stress points. Use sound clips with channel systems for higher isolation ratings, especially in rooms with strict noise requirements. While this setup improves STC ratings by 10–15 points, it reduces wall cavity depth slightly. Avoid plumbing or large mechanical boxes behind the drywall, as they compromise performance. You’ll gain real privacy, but the trade-off is added material cost and labor. Always follow manufacturer spacing guidelines-usually 16” or 24” on center-for reliable, tested results.
Install Resilient Channels on Ceilings
Though ceilings often transfer more sound than walls due to direct alignment between rooms, installing resilient channels correctly can greatly reduce airborne noise from above-just expect tighter tolerances and more precise layout work than on vertical surfaces. You’ll screw channels perpendicular to ceiling joists, so knowing your ceiling joist spacing-typically 16 or 24 inches on center-is critical for proper support and alignment. Use a laser level to mark consistent lines, ensuring each channel stays perfectly level. When fastening drywall later, you’ll need to monitor drywall screw depth carefully; over-driving transfers vibration and breaks decoupling. Screws should just dimple the paper without penetrating it. Work in small sections to maintain accuracy, and support channels at each end and every 48 inches. While the process takes more effort than on walls, the improvement in sound isolation is measurable, especially with IIC and STC ratings in real-world testing.
Avoid These Common Resilient Channel Mistakes
Getting resilient channels right means more than just nailing them to the framing-you’ve got to avoid a few predictable errors that undo the entire purpose of decoupling. Over tightening screws is a common misstep; it locks the channel rigidly to the stud, creating a bridge for sound to travel through. You should snug the screws just enough to hold the channel without compressing the drywall later. Misaligned channel spacing also compromises performance-keep channels spaced evenly at 16 or 24 inches on center, matching your framing. Gaps or staggered lines reduce isolation by allowing uneven stress and weak decoupling. Don’t mount channels parallel to joists on ceilings; always run them perpendicular for maximum effectiveness. Use non-electrical metal furring if stacking layers, and avoid sharing studs between walls and channels. These details matter-skip them, and your sound isolation drops markedly, no matter how thick your drywall is.
Test and Improve Your Soundproofing Results
How do you know if your resilient channels are actually doing their job? Test the space by playing consistent sound on one side and measuring decibel levels on the other. You’ll likely notice a drop, but gaps around outlets or seams can weaken performance. Seal those with acoustic caulk-it’s flexible and blocks sound leaks better than regular caulk. If results are still underwhelming, consider adding mass-loaded vinyl as an extra sound barrier. Just don’t attach it directly to the stud; that can ruin the decoupling effect. Layering materials helps, but only if each component is installed correctly. Remember, resilient channels reduce sound transmission, not eliminate it. Heavy bass frequencies often get through, so don’t expect complete silence. For home offices near noisy areas, this setup improves focus, but test under real conditions-music, voices, video calls-to judge actual performance.
On a final note
You’ll cut wall noise markedly by installing resilient channels, especially with airtight drywall and proper staggered stud framing. They work best when fully decoupled, so avoid screwing into studs. Use RC-1 or RC-2 rated channels, follow manufacturer specs, and mind ceiling fire codes. Performance dips if sealed poorly-test with a sound meter. It’s not magic, but with discipline, you gain real speech privacy. Just expect modest mid-frequency gains and higher material costs.