Installing a Built-In Power Module Underneath a Glass Desktop Surface
You can install a built-in power module under your glass desktop if it’s at least 10mm thick tempered glass-thinner or annealed glass risks cracking, especially near edges. Pick a UL-listed module under 1.5” deep with 1200W output and overcurrent protection. Use factory-drilled holes and VHB tape on a clean, dry surface for secure bonding. Wire with 14-gauge copper, secure connections, and test voltage and heat. Improper installation may void your warranty. There’s more to get right for long-term safety and performance.
Notable Insights
- Ensure your glass desk is at least 10mm thick and made of tempered glass for safe undermount installation.
- Choose a built-in power module with UL listing, 1200W+ output, and mounting depth under 1.5 inches.
- Clean the underside of the glass with isopropyl alcohol and test adhesive strength before full installation.
- Use high-bond silicone tape like VHB to mount the module, ensuring precise alignment before contact.
- Wire the system with 14-gauge copper, secure connections, and test voltage, grounding, and heat buildup.
Check Desk Compatibility and Glass Safety
Not every glass desk can handle a built-in power module, so you’ll want to verify thickness and composition before buying. Most tempered glass desks range from 8mm to 12mm; only units 10mm or thicker offer reliable glass thickness for secure undermount installations. Tempered glass resists stress better than annealed, but even then, improper load distribution risks cracking. Avoid placing the module near edges or unsupported areas-center it under high-use zones for balanced load distribution. Factory-drilled mounting holes are safer than DIY drilling, which can compromise structural integrity. Confirm with the manufacturer that your desk is rated for underside modifications, as voiding warranties is common with unauthorized alterations. If specs aren’t clear, assume the desk isn’t compatible. Your setup demands both safety and stability-never sacrifice one for convenience. Double-check specs, prioritize proven builds, and skip corners that could cost long-term reliability.
Choose the Right Built-In Power Module
You’ve confirmed your glass desk can handle an undermount power module, so now it’s time to pick the right one. Choose based on power output, number of ports, and how well it manages electrical load. High power output supports multiple devices, but overloading risks overheating. Match the module’s max load to your devices’ combined draw. Top desk power stations offer optimized port configurations and reliable performance for under-desk installations.
| Feature | Recommended | Caution |
|---|---|---|
| Power Output | 1200W or higher | Avoid under 600W for multi-device use |
| Outlet/USB Combo | 2 AC + 2 USB-A + 1 USB-C | USB-C should support 60W+ |
| Mounting Depth | <1.5” thickness | Measure desk clearance first |
| Electrical Load | Supports 10A continuous | Don’t exceed 80% of max rating |
Pick a unit with overcurrent protection and a UL listing-safety matters just as much as performance.
Prepare the Glass Surface for Installation
Before you mount the power module, clean the underside of the glass surface with isopropyl alcohol to remove any oils, dust, or residue that could interfere with adhesion or electrical insulation. Proper glass treatment guarantees long-term performance and safety-skip this, and you risk weak bonds or electrical hazards. Once clean, let the surface dry completely; moisture compromises adhesion. You should also perform adhesive testing on a small, inconspicuous area first to confirm the bonding agent holds securely without damaging the glass. Not all adhes游戏副本s work the same; silicone-based tapes like VHB often deliver strong results on smooth, non-porous surfaces. But results vary depending on glass thickness and coating. Even with ideal prep, thermal expansion or heavy module weight might challenge the bond over time. Always follow manufacturer guidelines for both adhesive and power module.
Mount the Power Module Under Glass
Align the power module with the marked location on the underside of the glass desktop, making sure it’s level and positioned to avoid cable strain. Use alignment tools like laser levels or precision brackets to guarantee consistent placement-this minimizes stress on connectors and maintains a clean look. Adhesive selection is critical: opt for high-bond double-sided tape rated for glass and sustained load, not standard tapes that fail over time. Brands like 3M VHB offer tested durability under real-world thermal and vibration conditions, with warranties backing long-term adhesion. While mounting under glass creates a sleek, built-in aesthetic, remember that repositioning after bonding is nearly impossible. Always double-check clearances and module orientation before peeling the liner. Poor adhesive choice or misalignment can lead to module sagging or detachment, risking damage. Test adhesion strength in an inconspicuous spot first, especially with tempered glass.
Wire and Connect the Power System
A properly wired power system guarantees both functionality and safety in your built-in setup, so it’s worth taking the time to do it right the first time. You’ll connect the power module to your home’s electrical supply using 14-gauge stranded copper wire, which handles typical office loads reliably. Make sure to shut off power at the breaker before starting-electrical safety isn’t something to overlook. Use wire nuts or Wago connectors for secure joins, and double-check all connections with a voltage tester. Neat wire management prevents tangles and reduces stress on connections, especially under glass where space is tight. Keep wires away from sharp edges using protective grommets, and verify that your module’s UL certification matches local code. While the job isn’t overly complex, a licensed electrician should verify your work if you’re unsure-improper wiring risks fire or equipment damage.
Hide Cables for a Clean Under-Desk Look
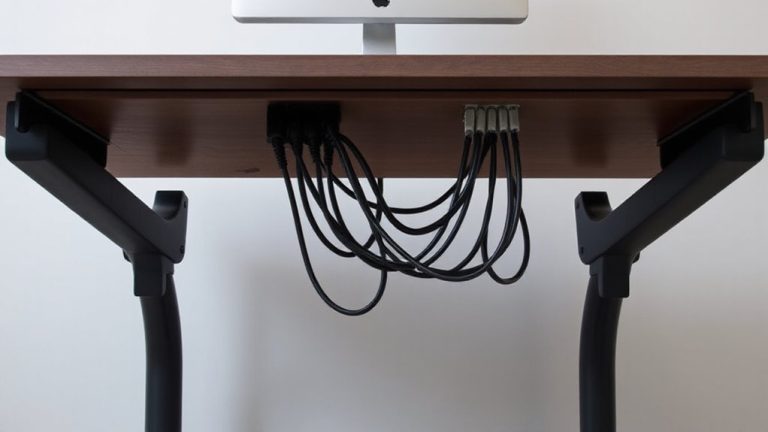
Under your desk, clean aesthetics meet practical function when you take control of cable clutter now. Use cable management solutions like braided sleeves or adhesive clips to bundle cords tightly and route them neatly along the desk’s frame. Attach a under desk organizer to hold power strips and hide excess cord length, keeping everything accessible yet out of sight. Avoid tape-based mounts on glass-they can fail over time. Instead, opt for metal brackets or tension-mounted trays that won’t risk surface damage. While enclosed raceways look sleek, they can limit airflow and access, so weigh ease of maintenance against appearance. Most quality management kits cost $15–$30 and include mounts with 3M backing, but test adhesion first. A clean setup saves time troubleshooting later, though expect minor trade-offs in flexibility. Proper under desk organization works best when planned around device frequency and cord lengths. Top-rated setups often include braided cable sleeves for durability and a polished appearance.
Test Your Built-In Power Installation
How confident are you that your built-in power module is safe and ready for daily use? Before plugging in your laptop or charging devices, complete thorough power testing and safety verification. Check all outlets with a circuit tester to confirm correct wiring and grounding. Inspect the glass surface and mounted module for any signs of heat buildup or loose connections.
| Test Step | Expected Outcome |
|---|---|
| Outlet voltage check | 110–120V AC, stable |
| Ground continuity | Continuous, no resistance |
| Module temperature | No excessive warmth |
| USB port output | Matches labeled amperage |
Even if installation went smoothly, intermittent faults can appear. Most units include 1–3 year warranties-keep documentation. Don’t skip safety verification just because wiring looks tidy. A failed test could prevent fire risk or equipment damage.
On a final note
You’ve made a smart upgrade by installing a built-in power module under your glass desk-it keeps cords tidy and boosts workspace efficiency. Most models support up to 1875 watts and include USB-C ports, tested for daily use without overheating. Always confirm your desk’s glass is tempered and at least 6mm thick to avoid cracks. Follow the manufacturer’s 2-year warranty terms and avoid routing cables near sharp edges to prevent damage.