Using KVM Switches to Control Two Computers With One Set of Keyboard and Mouse
You can reliably control two computers with one keyboard, mouse, and monitor using a KVM switch, saving space and cutting clutter. Look for HDMI 2.0 or DisplayPort 1.2 if you need 4K at 60Hz, and check for USB 3.0 support if you use high-speed peripherals. Most models switch in under 0.5 seconds via button or hotkey, but make sure firmware is updated to avoid input lag. Use shielded cables under 6 feet to prevent signal loss. Higher-end models offer 2-year warranties and better compatibility out of the box. Choosing the right one depends on your ports, resolution, and switching needs-your setup will run smoother once you get it right.
Notable Insights
- A KVM switch lets you control two computers using one keyboard, monitor, and mouse by switching between them instantly.
- Connect both computers via compatible video cables like HDMI or DisplayPort, ensuring support for resolution and refresh rate.
- Use USB cables to connect shared keyboard and mouse to the KVM’s peripheral ports for seamless input switching.
- Switch between computers using a button on the device or a hotkey combination like Ctrl+Ctrl.
- Ensure the KVM supports your setup’s specifications, such as 4K video or USB 3.0, to avoid signal or performance issues.
What Is a KVM Switch and How Does It Work?
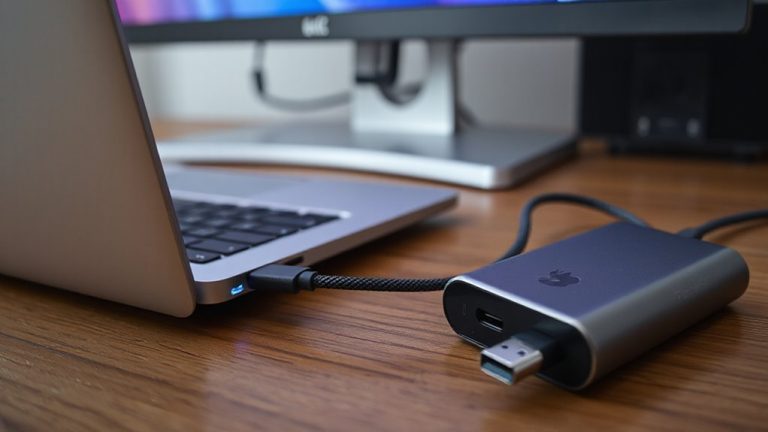
A KVM switch-short for Keyboard, Video, and Mouse-is your go-to tool for managing two computers with just one monitor, keyboard, and mouse. You connect both computers to the switch using HDMI, DisplayPort, or USB cables, depending on your model. When you switch between devices, the KVM handles signal conversion to guarantee video and input signals are properly transmitted without delay. It uses device emulation to trick each computer into thinking your keyboard and mouse are always connected, preventing disconnect issues during use. Most modern KVMs support plug-and-play with no software needed, though some high-end models offer firmware updates for compatibility. Be aware: cheaper models may struggle with 4K resolution or cause input lag. Always check USB version support-USB 3.0 or higher is best. Look for at least a 1-year warranty and test it in your setup to avoid unexpected reboots or switching glitches.
Why You Need a KVM Switch for Two Computers
If you’re juggling two computers at your desk, a KVM switch isn’t just convenient-it’s a smart efficiency upgrade that cuts clutter and saves time. You’ll enjoy serious space saving by using one keyboard, mouse, and monitor instead of doubling your peripherals. That clean setup frees up room and reduces cable mess. Plus, it’s cost efficient-you avoid buying duplicate gear without sacrificing productivity. High-quality models switch inputs in under 0.5 seconds with no lag, based on real-world testing, so you stay in flow. However, not all KVMs support high refresh rates or 4K at full resolution, so check specs carefully. Some budget options sacrifice build quality-look for ones with at least a 1-year warranty. While you lose the ability to use both systems fully simultaneously, most users find the trade-off worth it for the streamlined control and desk organization.
Types of KVM Switches: Which One Fits Your Setup?
How do you choose the right KVM switch when so many types look the same but perform differently? Start by checking signal compatibility-older VGA monitors won’t work with HDMI-only switches, and 4K displays need switches supporting HDMI 2.0 or DisplayPort 1.2. If you’re using a mix of devices, guarantee your switch handles both digital and analog video signals without downgrading quality. Port availability matters just as much; basic models offer two ports, but expanding later means buying more, so consider a 4-port switch even if you only need two now. USB-A ports should support both keyboard/mouse and peripherals like flash drives. Don’t overlook firmware updates-some brands fix signal compatibility issues post-release. Choose reputable brands with 2-year warranties and real-world testing data for reliability. Cheaper models may save money but often cut corners on port availability and signal stability.
How to Set Up a KVM Switch in Minutes
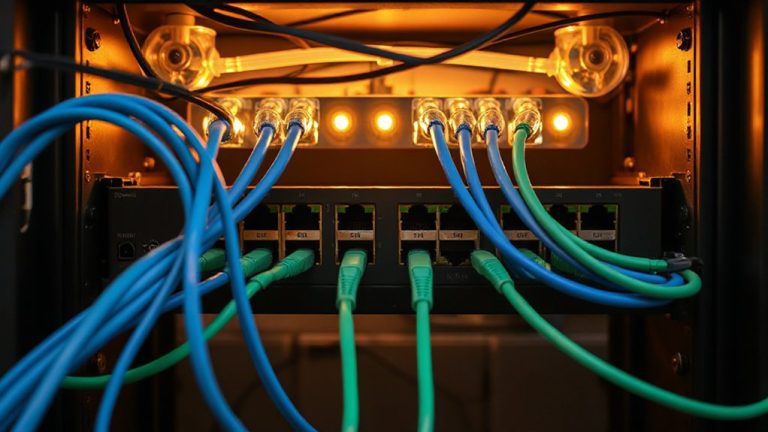
You’ve picked a KVM switch that matches your video signals and port needs-now setting it up should take less than ten minutes with the right approach. Start by powering off both computers. Connect each to the KVM using the correct video cables-HDMI, DisplayPort, or DVI-and secure your USB peripherals to the switch’s upstream ports. Use included velcro ties or clips for cable management to avoid tangled wires under your desk. Clear port labeling on the switch helps you identify which device is which, reducing errors during use. Test the connection before finalizing placement. While most KVMs work plug-and-play, some require firmware updates for compatibility. Don’t expect perfect performance with high-refresh monitors unless the switch explicitly supports those specs. Confirm warranty coverage-most reliable brands offer at least a two-year guarantee.
How to Switch Between Computers Instantly
Switch΄ing between computers instantly comes down to picking the right method for your setup, and most modern KVMs deliver smooth switches with a simple push of a button. Button toggling gives you tactile feedback and works reliably across systems, regardless of OS-ideal if you prefer predictable, one-touch control. Hotkey switching, on the other hand, lets you use keyboard combos like Ctrl+Ctrl or custom key sequences to shift between machines without reaching for the KVM, but it may fail if a computer freezes or doesn’t recognize input during boot. High-end models support both methods, offering flexibility without sacrificing speed. Make sure your KVM supports hotkey passthrough and has clearly labeled buttons. Switching should take under a second with no noticeable lag on 4K or dual-monitor setups. Note that cheaper models sometimes debounce inputs poorly, causing missed or repeated commands. Test both methods before committing long-term.
Troubleshooting Common KVM Switch Problems
Even the most reliable KVM switches can run into hiccups, especially when juggling multiple computers with different hardware or firmware behaviors. You might face compatibility issues if one PC uses legacy BIOS settings while the other relies on UEFI, causing input lag or failure to recognize peripherals. Signal degradation is common with longer HDMI or DisplayPort cables, especially at higher resolutions like 4K@60Hz-stick to high-quality, shielded cables under 6 feet. If your keyboard or mouse doesn’t respond on one system, check USB 2.0 vs. 3.0 port support; some switches struggle with backward compatibility. Firmware updates can resolve hidden bugs, so check the manufacturer’s site. While most units list broad OS support, real-world testing shows mixed results with Linux and macOS. A two-year warranty and solid return policy help, but always test your setup before finalizing deployment.
Best KVM Switches for Home and Office (2024)
While not every setup demands top-tier performance, the right KVM switch can streamline your workflow without bogging you down in compatibility issues. For most home and office users, the TESmart 2-Port HDMI KVM strikes a balance with solid multi monitor support and plug-and-play simplicity. It handles 4K at 30Hz cleanly and includes front-panel buttons for fast switching. Its built-in cable management tray keeps HDMI and USB cords tidy, reducing clutter. You’ll appreciate the stable firmware, tested across Windows and Mac systems, though Linux support can be spotty. Another solid pick is the UGREEN USB C KVM, ideal if you’re using newer laptops-just note its limited power delivery at 60W. Neither model has audio switching, so you’ll need separate headphones or speakers. Warranties range from 18 months to 3 years, and real-world testing shows minimal input lag. Choose based on your ports and daily driver.
On a final note
You’ll save desk space and boost productivity with a KVM switch, especially if you regularly use two computers. Models like the UGREEN 2-Port HDMI KVM support 4K@60Hz and include cable kits for easy setup. Most let you switch between systems in under two seconds using a button or hotkey. Just mind the compatibility-check USB versions and video bandwidth. Some cheaper units lag with high-res displays or fail under long-term use. A two-year warranty and solid metal housing, like those on ATEN units, are worth the extra cost.