Mounting Under-Desk Docking Stations for Cleaner Cable Management and Airflow
You should mount your docking station under the desk-it cuts cable clutter by routing cords straight to ports and improves airflow to prevent overheating. Pick a model with 90W+ power delivery, steel build, and ventilation gaps, and guarantee your desk is 0.8”–2.8” thick for secure fit. Use the included bracket with rubber padding to protect surfaces, and leave 2.5 inches of clearance for plug access. Avoid over-tightening screws or blocking airflow. There’s more to get right for long-term reliability.
Notable Insights
- Mounting the docking station under the desk keeps cables organized and reduces tangling by enabling direct port access.
- Under-desk placement improves airflow around the dock, preventing overheating and performance throttling.
- Utilizing space beneath the desk frees up surface area and enhances workspace ergonomics.
- Use sturdy metal brackets with rubber padding to securely mount the dock without damaging the desk.
- Ensure proper cable routing and strain relief to prevent port damage and maintain long-term reliability.
Why Mounting Your Dock Under the Desk Beats Clutter
While you might think stashing your docking station behind the monitor looks clean, mounting it under your desk actually solves more clutter problems than it creates-especially when you’re dealing with tangles of USB, power, and display cables. You avoid cable tangling by anchoring the dock in one spot, letting each cord run straight to its port. That means fewer knots, easier disconnects, and simpler troubleshooting. Mounting also improves airflow, reducing heat buildup that can throttle performance or shorten device lifespan. Most under-desk mounts use metal brackets with rubber padding to protect surfaces and support docks weighing up to 3 lbs. But check your desk thickness-many mounts only fit surfaces between 0.8” and 2.4”. And remember, if you use frequent plug-ins, you’ll lose the convenience of having ports within arm’s reach. Top models available at Best Buy offer advanced port selection and power delivery, making it easier to find a best docking station for your specific workspace needs.
How to Choose the Right Under-Desk Docking Station
What makes one under-desk docking station better than another? It’s not just ports and price-it’s ergonomic positioning and power efficiency. A great dock keeps your workspace clutter-free while delivering reliable, sustained performance. But not all mounts play nice with every desk or setup.
| Feature | Good Choice | Poor Choice |
|---|---|---|
| Cable strain relief | Secure, flexible routing | Tangled, exposed wires |
| Airflow design | Vents reduce heat buildup | Traps heat, risks throttling |
| Mounting fit | Fits desk thickness (1.2–2.8”) | Limited clamp range |
| Power delivery | 90W+, efficient charging | <65W, slow charging |
| Build quality | Steel, 3-year warranty | Flimsy plastic, no warranty |
Check compatibility with your laptop brand and verify VESA support if you plan future upgrades. Prioritize thermal management-overheating kills performance. You’ll want adjustable arms for ergonomic positioning. And always confirm power efficiency ratings; inefficient docks waste energy and increase heat.
Install Your Dock Under the Desk in 5 Simple Steps
One under-desk docking station can transform a messy workstation into a clean, efficient setup-if installed correctly. First, mark your mounting spot near the back edge, ensuring tool alignment with pre-drilled desk holes if available. Second, attach the mounting bracket securely using included screws-over-tightening risks striping. Third, snap the dock into place; confirm it’s flush to avoid wobbling. Fourth, position it slightly forward to allow room for plugs and heat dispersion-don’t block ventilation slots. Finally, test fit with your laptop before daily use. While under-desk mounts save space, they strain wrists if the desk is too high. Check manufacturer clearance specs: most need 2.5 inches of space between desk and dock. Use a rubber shim if vibration occurs. Installation takes under 15 minutes, but mistakes affect durability. Most docks come with a 1-year limited warranty-keep the receipt. For those also managing writing tools in their workspace, consider the importance of reliable tools like a high-quality pencil sharpener.
Organize Cables for a Clean Under-Desk Setup
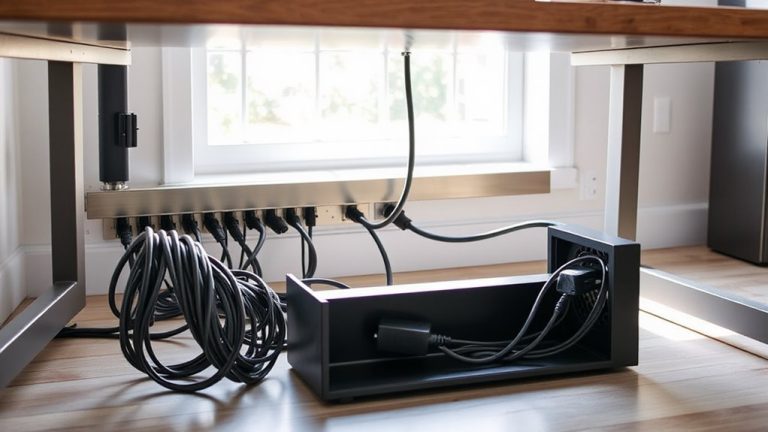
A clean under-desk setup doesn’t stop at mounting the dock-you’ve got to manage the cables too, or you’ll swap one kind of clutter for another. Use adhesive management clips to secure cords along the desk frame, reducing sag and strain. Group similar cables and employ cable labeling to avoid confusion during troubleshooting or upgrades. Keep lengths tight but not restrictive-too short, and you limit adjustability; too long, and you invite tangles. Implementing a clean desk aesthetics strategy enhances both functionality and visual appeal.
| Tool | Purpose | Best For |
|---|---|---|
| Velcro straps | Reusable bundling | Frequent changes |
| Adhesive clips | Route cables | Desk grommets |
| Sleeve tubing | Hide multiple cords | Fixed setups |
| Cable labels | Identification | Ports and devices |
| Mounting trays | Hold excess slack | Under-desk docks |
Labeling and adhesive management are small steps with big impact-just don’t overcommit to permanent fixes you might regret later.
Avoid These 5 Under-Desk Mounting Mistakes
Your under-desk docking station’s stability hinges on avoiding a few prevent – able errors-get the installation wrong, and you risk damage to your gear or a frustrating rework. First, don’t skip checking your desk’s material; mounting on particleboard without proper anchors leads to strip-out. Second, avoid over-tightening screws-this warps brackets and stresses ports. Third, ignore cable routing and you’ll face cable tangling, which complicates disconnects and creates strain. Fourth, placing the dock flat against the desk’s underside traps heat, causing heat buildup that shortens component lifespan. Guarantee a slight tilt or use spacers for airflow. Finally, skip load-testing the mount before installing your tech; a loose fit risks drops. Always verify compatibility with your dock’s model and weight. Most warranties won’t cover impact damage from poor mounting, so take the extra 10 minutes-it’s worth it.
On a final note
Mounting your dock under the desk gives you cleaner cables and better airflow, but only if done right. Pick a model with sturdy VESA or bracket support and enough ports-like USB-C, Ethernet, and power delivery-for your setup. Install it centered and level, leaving 2–3 inches of clearance for ventilation. Use adhesive cable clips or Velcro straps to manage cords without damage. Avoid overloading the mount or blocking cooling vents; some docks run hot, and poor airflow cuts their lifespan. Check warranty terms-many brands void coverage if installed improperly.