Acoustic Considerations for Video Content Creators and Online Teachers
Your room’s acoustics can wreck your audio no matter how good your mic is. Hard walls create echo; empty spaces worsen bass. Place DIY panels-under $50 using Owens Corning 703-at first reflection points to cut reverb. Use thick curtains or moving blankets on windows. A directional mic 6–12 inches from your mouth captures clear voice while rejecting room noise. Background filters in Zoom help, but overuse sounds robotic. You’ll want to see which setups fix issues fastest.
Notable Insights
- Position microphones 6 to 12 inches from the speaker to capture clear voice and minimize room reverb.
- Treat first reflection points on walls and ceiling with DIY panels to reduce echo and improve speech clarity.
- Use soft furnishings like carpets, curtains, and couches to naturally absorb sound and limit standing waves.
- Combine diffusion and absorption to maintain natural sound while controlling room modes and flutter echoes.
- Record in quiet hours and use software noise filters to reduce background noise without over-processing voice quality.
Why Your Room Can Ruin Your Audio
Ever wonder why your recordings sound hollow or muffled even with a top-tier microphone? Your room’s acoustics are likely the culprit. Room modes-resonant frequencies trapped between parallel walls-create uneven bass response, making your voice boom or dip unpredictably. Without proper sound diffusion, reflections build up, clouding clarity and reducing intelligibility. Hard surfaces like glass or wood amplify this, turning clean audio into a muddy mess. Even high-end gear can’t fix physics. Diffusers help scatter sound waves, breaking up standing waves while preserving natural ambiance-better than just absorbing everything. But placement matters: centering them across the rear wall and ceiling reflection points yields the best results. However, diffusers aren’t a one-size-fits-all fix-small rooms often need bass trapping first. Always measure your space and prioritize treatments based on room mode calculations. Real-world testing shows balanced diffusion improves voice accuracy without over-dampening.
How to Reduce Echo in Your Studio
While you can’t eliminate echo entirely without turning your studio into a silent chamber, you can substantially reduce it by combining absorption and diffusion in the right proportions and placements. Your room dimensions directly affect standing waves and reflection points-smaller rooms amplify echo, especially where parallel walls face each other. You’ll want to place acoustic panels at first reflection points, typically where sound bounces from your speakers to side walls or ceiling. Adjusting furniture layout helps too: bookshelves, couches, or even thick curtains can break up sound waves and reduce flutter. Avoid large open spaces around your recording zone, and don’t rely solely on corner foam, which only addresses bass buildup. Diffusion works best at the rear wall, while absorption panels (1” to 2” thick) handle mid and high frequencies. Results vary by room, so test with claps or a tone sweep-measurable improvement matters more than gear quantity. For home office setups, consider installing the best acoustic panels for home office to achieve optimal sound clarity and minimize distractions during recordings.
Build DIY Sound Treatment for Under $50
If you’re on a tight budget but still want effective sound control, building your own acoustic treatment for under $50 is a smart move-just don’t expect studio-grade performance. You can make basic acoustic panels with rigid fiberglass insulation boards (like Owens Corning 703), fabric covers, and wooden frames. These help reduce echo and improve voice clarity, though they don’t block sound like professional studio treatments. For soundproofing windows, consider heavy moving blankets or DIY curtains with mass-loaded vinyl-temporary fixes that dampen outside noise. Keep in mind, these solutions won’t seal gaps like permanent upgrades but offer noticeable improvements. Placement matters: mount panels at first reflection points and near your recording area. While not a complete fix, this approach gives measurable gains in room acoustics without draining your wallet. Manage expectations, but use what you can effectively.
Stop Background Noise From Ruining Recordings
Cuting down background noise is often more about smart positioning and affordable tools than dropping cash on high-end mics. Use background filters and noise cancellation features in software like OBS or Zoom-they’re effective but can’t fix a loud environment. Try these simple fixes:
| Solution | Effectiveness |
|---|---|
| Close windows and doors | High |
| Use a USB mic with built-in noise cancellation | Medium |
| Enable software background filters | Medium-High |
| Record during quiet hours | High |
Position yourself away from fridges, AC units, or traffic noise. Most background filters work best when the original recording is already fairly clean. Built-in noise cancellation in mics like the Shure MV7 helps, but over-processing can make your voice sound robotic. Always test recordings with and without filters to judge quality. Don’t rely solely on tech-smart habits make the biggest difference. A well-positioned best office microphone can significantly improve clarity without requiring professional studio equipment.
Place Your Mic to Avoid Room Echo
Most room echo can be reduced considerably by adjusting your mic’s placement rather than buying expensive acoustic panels. Proper mic placement helps capture your voice clearly while minimizing reflections from walls and hard surfaces. Position your microphone closer to your mouth-roughly 6 to 12 inches away-to boost the direct sound over ambient room noise and reverberation. A directional mic, like a cardioid condenser, rejects sound from the sides and rear, further reducing echo. While acoustic panels improve room sound, they’re often unnecessary if you optimize mic placement first. Soft furnishings, carpeting, or even hanging a blanket behind you can supplement the effect. Just don’t assume better gear replaces smart setup. Even top-tier mics pick up echo in poor positions. So tweak placement first-before investing in panels or upgrades. It’s free, effective, and often overlooked.
5 Room Setups That Fix Acoustics Fast
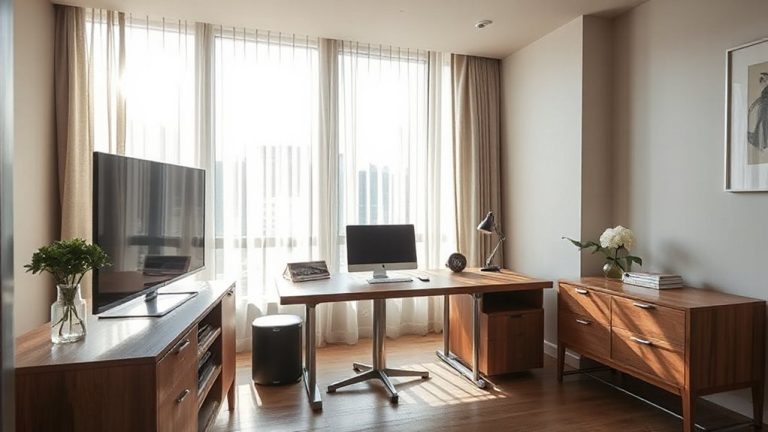
You can tackle room echo fast with smart setup choices that go beyond mic placement, especially when you combine strategic furniture arrangement with basic acoustic treatment. Soft furnishings like bookshelves and couches absorb reflections, while a darker room color reduces glare in your lighting setup without affecting sound. However, don’t rely on decor alone-target first reflection points with foam panels (1″–2″ thick) for noticeable improvement.
| Solution | Effectiveness & Trade-offs |
|---|---|
| Bookshelves as diffusers | High; breaks up sound, but needs space |
| Acoustic panels on walls | High; cuts echo, requires mounting |
| Rugs and curtains | Medium; helps, especially in bright rooms with poor room color contrast |
A balanced lighting setup minimizes shadows and avoids washing out your image, but position lights away from reflective surfaces to prevent audio-visual distractions.
On a final note
You can fix room acoustics without breaking the bank, but results depend on your space and effort. DIY panels using Owens Corning 703 cut to 2’x4′ kill echo effectively, especially when placed at first reflection points. A USB condenser mic like the Audio-Technica AT2020, mounted on a boom arm, captures clean audio if positioned 6–12 inches from your mouth. Background noise drops noticeably with a pop filter and quiet PC. Still, small rooms need more treatment, and perfection demands measurement-like using a free RTA app to spot reverb dips.