Building a Custom Cable Tray Under Your L-Shaped Desk
You can build a durable custom cable tray under your L-shaped desk using aluminum or powder-coated steel-they resist sagging and last over five years. Cut U-channels to fit both legs of the desk, mount near the rear edge with lag screws or inserts, and leave 2 inches of clearance for airflow and legroom. Use perforated trays to keep devices cool, and align cutouts with cable routes for easy access. Pre-drill holes to prevent splitting. You’ll find better results by testing the fit before final tightening.
Notable Insights
- Measure both legs of the L-shaped desk accurately, leaving 2 inches of clearance for legroom and ensuring a snug fit.
- Use aluminum or powder-coated steel for durability, ventilation, and resistance to sagging under cable load.
- Mount the tray beneath the desktop near the rear edge using lag screws or threaded inserts for secure attachment.
- Cut U-channels to size, drill pilot holes, and assemble with L-brackets to match the desk’s L-shaped configuration.
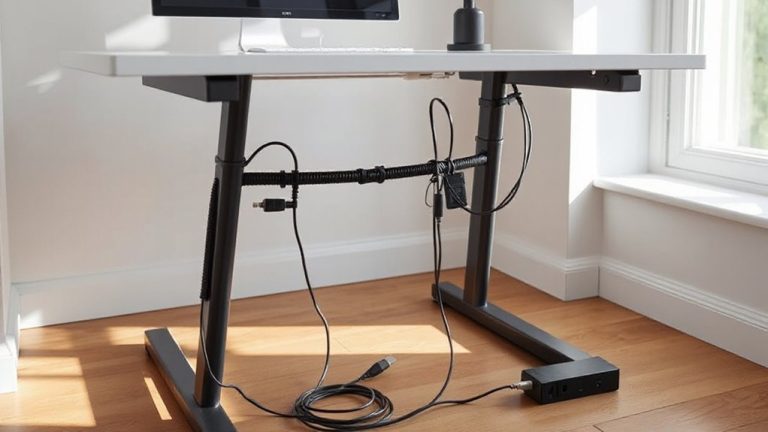
- Organize power strips and cables within the tray to reduce clutter, improve airflow, and maintain easy access.
Build a Clean Cable Tray for Your L-Shaped Desk
A clutter-free workspace starts with smart cable management, and building a custom tray under your L-shaped desk is one of the most effective upgrades you can make. It improves cable aesthetics by hiding power strips and cords while keeping them accessible. Good tray ventilation prevents overheating, especially when bundling multiple devices like docking stations or chargers. Use a metal or perforated material to allow airflow, avoiding plastic that traps heat. Mount the tray securely beneath the desktop, following the desk’s full L-shape to maximize cable routing options. Verify enough depth to hold cables without crowding-around 2 to 3 inches works for most setups. Cut access holes strategically, aligning with ports above and power sources below. While a custom tray looks cleaner and organizes tech efficiently, improper installation can limit legroom or cause snagging. Measure twice, mount carefully, and confirm clearances before final assembly. For optimal results, consider incorporating top cable management solutions based on expert-tested recommendations.
Choose Strong, Affordable Materials
Strength and value don’t have to compete-when choosing materials for your under-desk cable tray, aluminum and powder-coated steel strike the best balance between durability and cost. You’ll get solid material durability without overspending, thanks to aluminum’s rust resistance and steel’s higher load tolerance. Both handle daily wear well, but aluminum’s lighter, which helps during installation. Powder-coated finishes on steel prevent chipping and add extra corrosion protection, boosting long-term reliability. For cost efficiency, avoid thin plastic or untreated metals-they may save cash now but fail within months. Aluminum costs a bit more than steel, but you gain weight savings and won’t worry about rust near windows or AC vents. Steel’s stiffer, so it resists sagging over wide spans. Neither needs replacement often, and most come with 5-year warranties. Just confirm the specs match your cable load-overloading voids coverage. You’re building something functional, so pick wisely, not just cheap. Effective cable management solutions can significantly enhance both the functionality and visual appeal of your workspace.
Measure the Desk Corner for a Perfect Fit
Don’t assume one size fits all-measuring your L-shaped desk corner accurately is the surest way to get a cable tray that fits snugly and functions smoothly. Start by measuring the depth from the desk’s outer edge to the back, leaving at least 2 inches of clearance to avoid interfering with legroom or drawers. Record both legs of the L-corner, typically ranging from 18 to 24 inches-you’ll need both dimensions for proper cable management. Use a metal tape measure for precision, and double-check each number. An exact fit boosts workspace aesthetics by hiding cords cleanly underneath, creating a minimalist, organized look. However, slight measurement errors can lead to gaps or tight fits that hinder installation. Always test-fit the frame before final assembly. Precision matters-off-the-shelf trays often don’t align with unique desk designs, so custom sizing guarantees your build integrates seamlessly while maintaining accessibility and clean cable routing.
Build the Tray Frame in 5 Steps
Precision starts with assembly-building your custom cable tray frame in five clear steps guarantees a clean, functional setup under your L-shaped desk. First, cut two aluminum U-channels to match your earlier measurements for consistent tray alignment. Second, drill pilot holes every 6 inches to prevent cracking during assembly. Third, connect perpendicular supports at each corner using L-brackets and 10mm screws for rigidity. Fourth, sand all edges lightly to avoid snagging cables during routing. Fifth, double-check levelness and adjust as needed-minor misalignment here complicates mounting later. Proper cable routing depends on this frame being square and stable. While aluminum keeps weight low, it demands careful handling to avoid bends. Wooden alternatives offer rigidity but add bulk. This frame won’t hold power strips or heavy gear-its job is organization, not load-bearing. Test fit before final tightening; adjustments are harder once secured. For optimal results, pair this setup with best cable management solutions to maintain a clutter-free desk environment.
Mount It Under Your L-Shaped Desk
Mounting the tray securely under your L-shaped desk means picking the right fasteners and knowing your desktop material. Use lag screws for solid wood tops-they offer reliable hold, especially with washers to prevent pull-through. If you’ve got particleboard or MDF, go with threaded inserts for better grip and long-term stability. Position the tray near the desk’s rear edge to maximize tool accessibility without interfering with legroom. Align it level so cables feed smoothly, reducing stress on connectors. Proper placement also enhances aesthetic integration, letting the tray blend with the desk’s lines instead of looking like an afterthought. Avoid over-tightening fasteners; you risk cracking the desktop or stripping the holes. Pre-drill pilot holes to avoid splitting, especially near edges. Double-check clearance for pedestals or drawers before final tightening-some L-desks have asymmetrical understructures that limit mounting zones. A secure, well-placed tray supports both function and form.
Organize Cables for a Tidy Look
Now that the cable tray’s securely fastened beneath your L-shaped desk, it’s time to bring order to the wires feeding your devices. Route each cable neatly, grouping power, data, and peripheral lines to minimize tangles. Use cable labeling so you can identify each line at a glance-this helps during troubleshooting or when moving equipment. Modular connectors offer flexibility, letting you swap or extend connections without replacing entire runs. They’re reliable if you choose ones with gold-plated contacts and proper shielding. Velcro straps work better than zip ties; they allow adjustments without cutting. Avoid overloading one side of the tray-balance the load for stability. While this setup improves accessibility and cleanliness, it won’t eliminate all clutter if cables are poorly matched or excessively long. Test fit each connector before finalizing placement. A well-organized tray saves time and reduces wear on ports and cables.
Update the System as Needs Change
As your workspace needs evolve, it’s smart to adapt your cable tray setup rather than stick with a layout that no longer fits-modular systems make updates manageable, but only if you planned for flexibility from the start. Prioritize system scalability when selecting rails or brackets; not all aluminum extrusions and mounting hardware support easy extension. Future upgrades like additional monitors or docking stations demand space and accessible routing channels, so leave slack in power and data lines. Re-evaluate fastener types-thumb screws aid frequent changes, while hex bolts offer rigidity. Test adjustments before final tightening to avoid misalignment. Remember, even the most adaptable tray can become cluttered if you overlook cable diameter increases or new device power needs. Balance ease of access with structural stability. Update labels whenever you modify connections to maintain order. A well-designed tray supports change, but only if you use consistent, compatible parts.
On a final note
You’ll get a clean, durable cable tray by using 40x20mm aluminum extrusions and nylon zip ties. It fits most L-shaped desks with a 90° corner and supports up to 15 lbs. Mounting requires basic tools and anchors for particleboard. While it improves cable access, frequent reconfigurations may loosen mounts over time. Test fit before final assembly. The setup costs under $60 and lasts years with moderate use, but won’t handle heavy power strips.