Designing a Cable-Free Illusion on a Glass-Topped Workstation
You can create a clean, cable-free look on your glass desk, but it takes careful planning and the right materials. Use flat, flexible cables and adhesive polycarbonate channels bonded to the underside edge-clean the glass first for lasting hold. Pair with 3M residue-free clips every 8–10 inches to control slack. Tempered glass transfers heat and shifts slightly, so check connections every two weeks to prevent strain. Wireless peripherals cut clutter, though you’ll need to manage battery life. Adhesives last over two years if undisturbed, but avoid overloading channels-bundles thicker than 0.5 inches won’t snap closed. Success depends on discipline, compatible gear, and routine upkeep. There’s more to get right if you want it to last.
Notable Insights
- Plan cable routes beforehand to minimize visible wiring by aligning cords with desk edges and using centralized power solutions.
- Use adhesive polycarbonate channels on the underside of the glass to conceal cords securely without damaging the surface.
- Opt for flat, flexible cables paired with low-profile clips to reduce bulk and maintain a clean, streamlined appearance.
- Install snap-on covers only on thin cable bundles to hide wires completely while avoiding stress on glass edges.
- Transition to wireless peripherals with long battery life to reduce cord clutter and enhance the cable-free aesthetic.
Know the Cable Challenges of Glass Desks
While glass desks offer a sleek, modern look that elevates any workspace, they come with real cable management hurdles you can’t ignore. Glass conductivity means heat from electronics transfers quickly, raising surface temps enough to accelerate cable brittleness over time. You’ll notice rubberized coatings crack faster, especially with constant plug/unplug cycles. Non-abrasive corners help, but rigid cables snap more easily under stress than on wood or metal desks. Mounting grommets or adhesive clips often fail due to smooth, non-porous surfaces-tested models lose grip within 3–6 months. Even tempered glass shifts minutely under load, stressing connected ports. You’ll need reinforced, flexible cabling rated for temperature variance. Avoid routing cables underneath unless enclosed; exposure worsens wear. While the aesthetic payoff is real, expect higher maintenance. Plan for frequent inspections and cable replacements every 18–24 months to prevent failures. Investing in a desk with built-in cable management features can significantly reduce these issues, especially when choosing among the best standing desks for your workspace.
Plan Your Cable Routes Before Adding Tools
How do you keep a glass desk looking sleek without cables ruining the illusion? You plan your cable routes before adding tools. Start by mapping where each device will sit-monitor, laptop, power strip-to determine ideal paths. Acc游戏副本lable measurement prevents excess slack, which bunches under the glass and breaks the clean look. Measure from output port to power source or hub, adding just 6–8 inches for flexibility. Tool alignment matters too: position devices so cords run parallel to desk edges, minimizing visible cross-runs. A wireless keyboard and mouse reduce clutter, but wired peripherals need strategic drop points. Remember, glass offers no cover for mistakes-once tools are in place, rerouting becomes messy. This step isn’t about hiding yet; it’s about setting the foundation. Skip it, and even clever concealment later can’t fix poor planning. For optimal results, consider using a cable management box to centralize and streamline connections beneath the desk. This approach supports a clean desk aesthetic by reducing visual noise and organizing essential cords out of sight.
Hide Cables Under the Glass With Adhesive Channels
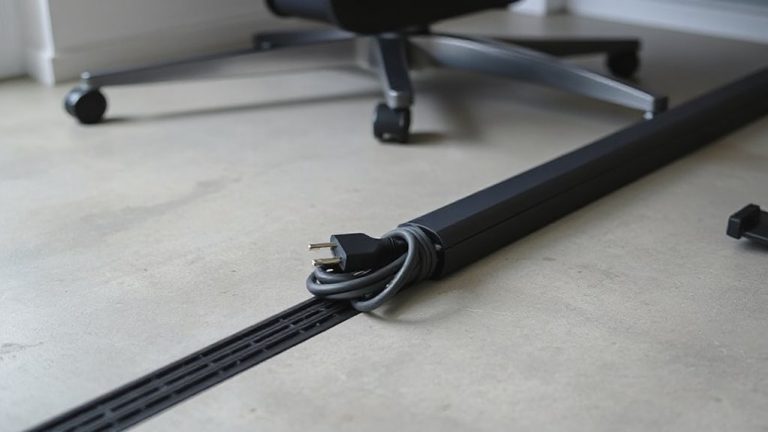
An adhesive cable channel is your best bet for keeping wires hidden and organized under a glass desk, but only if you choose the right product and install it correctly. Look for a model with strong adhesive strength durability-tested to hold up to 10 lbs per foot-so it won’t peel over time, especially in warmer environments. Clear or frosted polycarbonate channels work best, preserving the cable management aesthetics without drawing attention. Apply them along the underside edge of the glass, where wires run from monitors to power strips. Make sure the surface is clean and dry before installation, or the bond may fail. While they’re low-profile and nearly invisible once in place, channels can’t hide bulky cords or thick bundles. Choose flat, flexible cables to fit snugly inside. This solution maintains a clean look, but requires precise routing during setup. For optimal results, consider product recommendations from top-rated cable management solutions tailored for minimalist office environments.
Secure Loose Wires With Clear Clips and Covers
A few well-placed clear clips can make all the difference in keeping stray cords under control without marring the sleek look of your glass desk. These clips are essential for effective cable management and reducing visual clutter. Most are made of durable, transparent polycarbonate and adhere with strong 3M tape that won’t leave residue. They work best when you route wires along the desk’s edge, securing them every 8–10 inches to prevent sagging. Covers snap over the clips to hide cords completely, but guarantee your cables aren’t too thick-some bundles exceed their 0.5-inch capacity. While they’re nearly invisible under normal light, scratches can accumulate over time with frequent adjustments. Choose models with a matte finish to minimize glare. Though not ideal for heavy-duty setups, they’re practical for light to moderate use and tested to last over two years without yellowing.
Place Devices to Minimize Cord Tangles
Strategic placement keeps your glass desk looking clean and your workflow unhindered. Group devices-like your monitor, laptop, and power strip-near each other to reduce cable stretch and simplify cable management. A monitor placed toward the back edge leaves room for a laptop dock in front, cutting cross-desk wiring. Center heavier items to avoid stress on glass, and leave 2–3 inches between the wall and desk for airflow and cord access. You’ll boost workspace aesthetics by aligning ports and plugs so cords run straight down, not across. Use adhesive velcro straps under the desk to secure slack. Keep in mind: poor positioning can create hidden snarls, defeating the illusion. Even with smart layout, you’ll still need minimal ties or channels. It’s not about eliminating wires-it’s about making them predictable and unobtrusive. Test your setup with all devices powered on to catch strain or heat issues early.
Cut Cords Entirely With Wireless Peripherals
You’ve minimized tangles with smart placement-now go further by removing the cables altogether. Switching to wireless peripherals like keyboards, mice, and headphones cuts clutter and enhances the sleek look of your glass-topped workstation. Most models use Bluetooth pairing, which is reliable within 30 feet and avoids the need for USB dongles. For consistency, choose devices with strong battery life-ideally 30+ hours-and fast wireless charging so you spend less time plugged in. Reputable brands offer two-year warranties and have proven durability in real-world use. Keep in mind, wireless devices need occasional charging, and signal interference can happen near routers or microwaves. Bluetooth pairing sometimes requires reconnection after system updates. Still, the clean appearance and freedom from cords make the trade-offs manageable. Pick models with low latency to avoid typing delays.
Check and Re-Tidy Cables Every Two Weeks
Every few weeks, cables tend to slip out of place-so make it a habit to check and re-tidy them every two weeks to maintain both function and appearance. This simple routine maintenance keeps your glass-topped workstation looking clean and helps prevent tangles or strain on ports. During each cable inspection, look for fraying, unusual stiffness, or loose connectors-especially on power and USB-C lines-since early signs of wear can lead to failure. Velcro straps work better than zip ties for easy adjustments, and labeled sections help identify devices quickly. Be realistic: daily use will disrupt neatness, so don’t skip checks even if it seems unnecessary. While wireless gear reduces clutter, most setups still need at least one power cord. This habit takes under five minutes but extends cable life and guarantees safety. It’s not about perfection-it’s consistent care that makes the illusion last.
On a final note
You can pull off a clean, cable-free look on your glass desk, but it takes planning and the right tools. Adhesive channels and clear clips keep wires tidy, while wireless peripherals cut clutter at the source. Just remember: wireless means charging, and adhesive fails if the surface isn’t spotless. Test setup stability weekly-especially after cleaning-and replace worn mounts promptly. Results look sharp, but maintenance is non-negotiable.