Mounting Monitors on Wall Brackets to Free Up Desk Space and Improve Viewing Angles
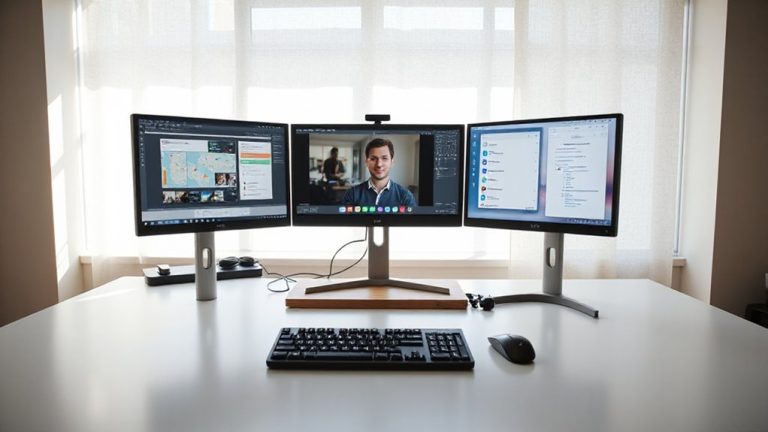
You save desk space and improve ergonomics by mounting your monitor on a wall bracket, positioning the screen at eye level to reduce neck strain and clutter while gaining room to work. Make sure your monitor has a VESA pattern (75x75mm or 100x100mm) and your wall hits studs-drywall anchors alone won’t hold long-term. Articulating mounts offer tilt and swivel for better angles but need sturdier installation. Fixed mounts save money if your setup stays static. Either choice cuts visual clutter, especially with cable covers. Just confirm weight limits and wall type first-otherwise, you risk damage or poor alignment. There’s more to get right for lasting comfort and safety.
Notable Insights
- Mounting monitors on wall brackets frees up desk space for better organization and multitasking.
- Position screens at eye level to improve ergonomics and reduce neck and shoulder strain.
- Confirm VESA compatibility and monitor weight fit within the mount’s specifications.
- Use articulating mounts to adjust viewing angles, support portrait mode, and enhance flexibility.
- Secure the mount to wall studs to ensure stability and prevent damage to walls.
5 Reasons to Mount Your Monitor on the Wall
You’ll often find that mounting your monitor on the wall saves desk space and improves ergonomics, especially in compact home offices or shared workspaces. The space saving benefit is immediate-clearing room for keyboards, notebooks, or multitasking tools. Wall mounts also boost aesthetic appeal by reducing visual clutter and creating a clean, minimalist look. Most VESA-compatible arms support 17–27-inch screens and allow tilt, swivel, or rotation, though check your monitor’s pattern (usually 75×75 or 100x100mm). Solid mounts use steel construction and hold displays securely, but installation demands stud-finding or anchoring into drywall with care. Some lightweight brackets sag over time, so pick ones with tension indicators or lifetime warranties. While you gain flexibility and a sleek profile, remember: permanent mounting limits quick reconfiguration. Consider reversible hardware if you move often. For Apple Studio Display users, compatible VESA mounts for Apple Studio Display ensure secure and adjustable wall mounting.
How Wall Mounts Fix Your Posture and Reduce Neck Pain
When set up correctly, a wall-mounted monitor can considerably improve your posture and reduce neck strain over time by aligning the screen with your natural line of sight. You achieve better ergonomic alignment when the top of the display sits at or slightly below eye level, reducing the need to tilt your head up or crane forward. This positioning supports a neutral spine and relaxed shoulders, especially during long work sessions. Wall mounts also promote visual comfort by minimizing glare and reflection from ambient light, since you can fine-tune the monitor’s height, tilt, and distance. Most articulating arms offer smooth adjustability, letting you switch between sitting and standing desks seamlessly. Just make sure your mount allows full range of motion and secure attachment. Poor installation or incorrect height can worsen strain, so measure twice and follow the manufacturer’s guidelines. For those seeking flexible setups, choosing the best monitor arms can enhance both comfort and workspace efficiency.
Check Your Monitor and Wall for Mount Compatibility
A wall-mounted monitor can transform your workstation’s comfort and efficiency, but it won’t help your posture if it isn’t compatible with your gear or wall setup. First, confirm your monitor supports VESA standards-most do, but smaller or ultrawide models sometimes don’t. Check for a 75x75mm or 100x100mm mounting pattern on the back. Then inspect your wall: drywall needs wall anchors rated for your monitor’s weight; studs are better for heavier setups. Avoid mounting on hollow walls without proper anchoring. For the best results, choose a mount that matches both your monitor’s size and your desk’s structural support, such as those featured in the best monitor mounts roundup.
| Feature | Compatible | Not Compatible |
|---|---|---|
| Mounting Pattern | 75x75mm, 100x100mm | Proprietary brackets |
| Wall Type | Studs, anchored drywall | Unreinforced drywall |
| Monitor Weight | Under mount limit | Over mount limit |
Always double-check specs-your mount’s rating and wall strength matter just as much as the bracket.
Fixed vs. Articulating Wall Mounts: Which One You Need
Why settle for a static setup when your workspace demands flexibility? If you move around your desk often or share it with others, an articulating wall mount with adjustable arms gives you the freedom to pull, tilt, and position your monitor exactly where you need it. These mounts support swivel rotation, letting you shift between landscape and portrait modes or angle the screen away from glare. Fixed mounts are cheaper and sleeker but lock your monitor in one position-fine if your viewing spot rarely changes. Articulating models cost more and may require sturdier wall anchors, especially for larger displays. Most reputable brands offer at least a 5-year warranty on moving parts, and third-party tests show high durability in daily use. Still, confirm your wall type supports the added stress from extended arms. Pick articulating mounts for adaptability; choose fixed ones for simplicity and lower cost.
Step-by-Step: Installing a Monitor Wall Bracket
How confident are you that your monitor will stay put once mounted? With the right mounting tools and careful bracket alignment, wall mounting can be secure and effective. Always check stud placement-most brackets need at least two studs for stability. Start by marking the bracket position, then use a level to guarantee precise alignment before drilling. Match your monitor’s VESA pattern to the bracket, and use the included hardware.
| Feeling | Outcome |
|---|---|
| Doubt | Loose mount, screen tilt |
| Fear | Poor alignment, wall damage |
| Relief | Clean look, saved desk space |
| Pride | Perfect viewing angle, solid fit |
Test the mount with light pressure after installation. Drywall anchors alone aren’t enough for heavy monitors-use studs.
Hide Cables Like a Pro on a Wall-Mounted Monitor
Now that your monitor’s securely mounted and sitting at the perfect viewing angle, it’s time to tackle the clutter trailing behind it-those exposed cables can undo a clean setup fast. Good cable concealment solutions and smart routing techniques make a huge difference. Start by grouping power, HDMI, and USB cables with Velcro ties to keep them aligned. Run them through adhesive-backed raceways that stick directly to the wall-choose white or gray to blend in. For a cleaner look, consider in-wall conduit kits, but only if you’re comfortable working behind drywall and following electrical safety codes. Flat cables route easier and are less visible than round ones. Just don’t overload circuits or bend cables too tightly. Some desks include grommets that align with wall mounts, simplifying drops. While most concealment products are affordable, poorly rated raceways may yellow over time or lose adhesion. Aim for UV-resistant models with at least a 1-year warranty for lasting results.
3 Times You Should Skip a Wall Mount
Ever wonder when skipping a wall mount actually makes the smarter move? You should avoid one if your wall lacks solid backing-drywall alone won’t support heavy monitors, raising wall instability risks. Uneven stress can lead to sudden bracket failure and monitor damage. Also, if you rent, landlords may prohibit permanent installations, and removing mounts later could cost you fees. Frequent repositioning needs? Wall mounts limit flexibility compared to adjustable arms on desks. For dual-monitor setups, alignment is trickier on walls unless studs are perfectly spaced. Even mid-tier mounts (like those from AmazonBasics or Ergotron) can’t fix poor wall conditions. Always check stud placement first-use a reliable stud finder, not guesses. If mounting isn’t structurally sound or practical for your workflow, keeping the monitor on a sturdier desk stand isn’t failure-it’s smarter planning.
On a final note
Mounting your monitor saves desk space and improves viewing angles-just make sure your display has VESA mounting holes and your wall can support the bracket. Fixed mounts are cheaper and sleek, but articulating ones let you swivel and tilt for better ergonomics. Installation’s usually straightforward with a stud finder and basic tools. Hide cables neatly with adhesive clips or a raceway. Skip it if you rent, move often, or need screen flexibility.