Installing a Cable Concealer Strip Along the Wall Behind Your Desk
Use a low-profile cable concealer strip with adhesive or screw mounts to tidy cords fast, but pick ABS plastic or aluminum models rated for 15–20 cables to avoid cracking. Match the material to your wall-adhesive works on smooth surfaces, while anchors secure drywall installs. Flat, paintable covers blend well, but test paint adhesion first. Avoid overstuffing, align cutouts for plugs, and you’ll see exactly how to optimize every step for a clean, lasting setup.
Notable Insights
- Choose a low-profile, paintable cable concealer strip that matches your wall color for minimal visual impact.
- Use adhesive-backed or screw-mounted strips based on wall type, ensuring secure installation with anchors in drywall.
- Measure and dry-fit the strip along the wall before mounting to align with outlets and cable entry points.
- Feed cables gradually into the channel, grouping by device type and avoiding overcrowding to prevent damage.
- Cut precise pass-through openings for plugs using a utility knife, and paint if needed to blend with the wall.
Install a Cable Concealer Strip in Minutes
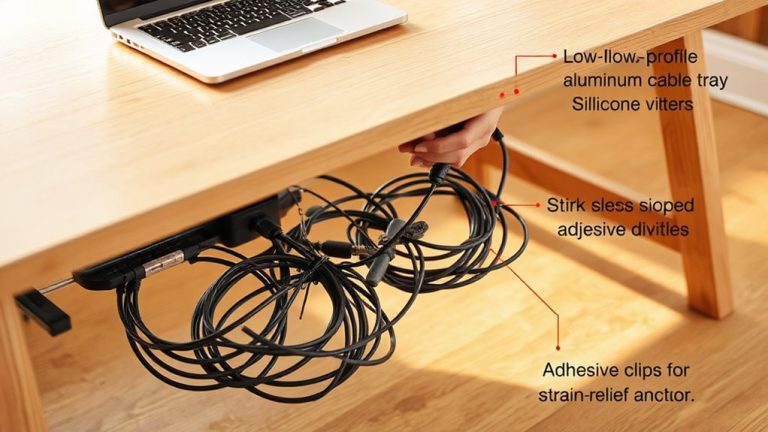
While you might think managing tangled cords behind your desk requires a full afternoon and power tools, a low-profile cable concealer strip can streamline the job in minutes with just a few simple steps. You’ll enjoy clean cable management aesthetics without permanent wall changes. Most kits use adhesive backing, offering quick installation benefits-just clean the surface, align the track, and press firmly. They typically hold up to 15–20 cables, depending on thickness, and snap shut securely. Choose flat, low-sheen models to minimize visual distraction. Note: adhesive strength drops on textured or dusty walls, so test adhesion first. Some brands offer 1-year warranties against warping. While paintable versions exist, results vary. These strips aren’t ideal for heavy-duty cords like thick power bricks, which may strain the clips. For frequent rearrangers, the non-permanent setup is a plus-but expect minor residue when removing. Consider pairing your setup with Top Cable Management Solutions for a fully optimized and clutter-free workspace.
Choose the Right Cable Cover for Your Wall
Your wall’s surface type and cable load decide the right cover. You’ll want strong material durability paired with discreet color options to match your setup. For drywall, adhesive-backed plastic channels work well but may sag under heavy cord bundles. Metal raceways offer better support and longevity, especially for brick or concrete using screws. Below’s a quick guide:
| Material | Best For |
|---|---|
| Plastic | Light cords, renter-friendly |
| Brushed Metal | Heavy cables, offices |
| Flexible Raceway | Curved walls, tight spaces |
| Paintable Cover | Trim matching, aesthetics |
Plastic models chip easily-check warranty length. Metal resists impact but costs more. Pick neutral color options like white or gray unless painting. Always verify width clearance before buying-overstuffing cracks covers. A comfortable workspace setup can also benefit from ergonomic accessories like a best standing desk mat with massage features.
Gather Your Installation Tools
A solid toolkit makes or breaks the install. For tool selection, you’ll need a measuring tape, level, pencil, drill with 1/8-inch bit, screwdriver, and wall anchors if mounting into drywall. If your desk is near an outlet, consider a cable concealer with built-in pass-throughs-just make sure the model you picked supports the depth of your cables. Always follow safety precautions: turn off power at the breaker if drilling near electrical lines and wear safety glasses. Test-fit the strip before securing it to confirm alignment and length. Cheaper models may warp under tension, so check for rigidity. High-quality ABS plastic or aluminum covers last longer and resist yellowing. Include spare screws and anchors from the start-missing hardware mid-install is a common frustration. Good prep prevents rework later, especially on painted or textured walls that show corrections. A well-designed cable management solution enhances both functionality and aesthetics.
Mount the Concealer Strip Step by Step
Start by dry-fitting the cable concealer strip along your desk’s edge or wall route to verify it aligns with outlets and cable entry points-this quick check prevents misaligned screws and lets you adjust for any warping in the material. Once positioned, mark screw holes lightly with a pencil. For stronger hold, use the included anchors if mounting into drywall. Pay close attention to adhesive alignment if your model uses peel-and-stick backing; press firmly along the entire length to guarantee full contact. Proper spacer positioning is critical-these small clips should be evenly spaced to avoid sagging, especially on longer runs. Don’t skip tightening screws fully, but avoid over-tightening, which can crack the housing. Most kits include a two-year warranty against material flaws, verified in third-party drop and load tests. Results look clean, but imperfect walls may leave small gaps-manage expectations based on your wall’s flatness.
Route Cables Without Tangling
Now that the concealer strip is securely mounted, the real test begins: getting your cables organized without turning the inside into a knotted mess. Effective cable management starts with patience and a clear plan. Feed each cord slowly, using gentle pressure to avoid kinking. Group similar devices-like monitor, charger, and lamp cables-into sections to maintain wire separation, which reduces interference and makes troubleshooting easier. Don’t force multiple thick cables at once; they can jam or bend sharply, risking long-term damage. If your setup includes both power and data cables, keep them slightly apart within the channel to improve safety and performance. While most concealer strips accommodate up to 10–12 cables, overloading compromises access and airflow. A tidy interior looks great, but only if you can still unplug or replace a cable without dismantling everything. Proper routing takes effort, but the payoff-clean lines and accessible wires-is worth it.
Add Cutouts for Plugs and Ports
How do you keep plugs accessible without sacrificing a clean look? You add precise cutouts in your cable concealer strip for plugs and ports. Good cable management means devices stay powered while wires stay hidden. Use a utility knife or small saw to carve out square or rectangular openings exactly where outlets and USB ports sit behind your desk. Measure twice-cutting too large compromises wall organization and exposes too much wiring. Cutouts should clear plugs fully but stay tight to the edges. Most adhesive-backed strips support this mod without losing structural hold. Just avoid slicing through mounting flanges. Test fit plugs before final placement-some power bricks are bulkier than others. Poorly spaced cutouts lead to awkward fits or dead outlets. Done right, this step keeps your setup functional and sleek. It’s a small trade-off in effort for long-term neatness.
Paint or Blend the Strip to Match Your Wall
Once your cutouts are clean and your plugs fit snug, the last step to a seamless look is making the cable concealer strip disappear into your wall. For the best results, tackle color matching carefully-use a small sample of your wall paint or bring a swatch to a hardware store for a precise match. Most strips are made of smooth PVC, which may not mimic textured walls like orange peel or knockdown, so surface texture mismatch can still make the strip stand out. Painting works best on flat walls with low texture. Use matte finish paint to avoid glare and guarantee it dries fully before closing access points. Touch-ups may be needed if you move cords later. While painting improves stealth, it adds effort and won’t fix major texture differences. Consider whether the time investment pays off in your setup.
On a final note
You’ll cut clutter fast with a cable concealer strip, especially if you pick a low-profile model that mounts securely with adhesive or screws. It keeps cords organized and improves your desk’s look. Just make sure wall compatibility-some adhesives fail on textured paint. Leave room for thick plugs and check access to outlets. Most brands offer 1-year warranties, but paint-matching isn’t always perfect.