How to Optimize Lighting for Video Conferencing With Ring Lights and Key Lighting
Position your ring light 6 to 12 inches above your monitor, centered on your face, to avoid unflattering uplighting and guarantee even illumination. Add a key light at a 45-degree angle and slightly above eye level to create natural depth without harsh shadows. Balance both lights to soften dark areas under the eyes and jawline, then set color temperature between 4000K and 5000K for accurate skin tones. Use diffusers and adjust brightness to 50–75% to prevent glare or washed-out faces. Many lights lack sync, so fine-tune intensity manually for a balanced look-small tweaks make a noticeable difference.
Notable Insights
- Position the ring light 6 to 12 inches above your monitor, centered and at eye level for even, flattering facial illumination.
- Place the key light at a 30- to 45-degree angle from your face and slightly above eye level to create dimension.
- Balance the brightness of the ring and key lights to maintain even exposure while preserving natural facial shadows.
- Set color temperature between 4000K and 5000K for neutral skin tones and avoid overly warm or cool casts.
- Use diffusion or dimming to prevent glare and overexposure, adjusting brightness based on ambient room light.
Place Your Ring Light for Maximum Flattery

While your ring light won’t magically turn a cluttered corner into a studio setup, positioning it correctly can make a real difference in how you appear on camera. Proper light placement-about 6 to 12 inches above your monitor and centered-helps balance facial symmetry by reducing harsh shadows. You’ll look more alert and evenly lit, which boosts professionalism during calls. If the light’s too low, it creates unflattering uplighting; too high, and you’ll cast heavy eye sockets. For most, aligning the ring with your eyes works best. Keep it close enough to diffuse shadows but far enough to avoid glare. While ring lights simplify lighting, they can flatten depth if used alone. Adjust your seat and camera to maintain a neutral expression under the glow. No fixture fixes poor posture or dim surroundings, but smart placement sharpens your on-screen presence without overpromising. Results vary by face shape and room brightness-test angles during a mock call.
Add a Key Light for Natural Depth

If you’re aiming for a more dimensional look on camera, adding a key light positioned at a 30- to 45-degree angle from your face can make a noticeable difference in how your features appear. This setup introduces directional highlights and subtle contrast, creating a chiaroscuro effect that adds natural depth without looking dramatic. While ring lights offer even, soft illumination, they often flatten facial contours. A key light corrects that by modeling your features more realistically.
| Feature | Benefit |
|---|---|
| 30–45° angle | Enhances facial structure |
| Directional highlights | Creates visual depth |
| Chiaroscuro effect | Adds professional polish |
Use a continuous-spectrum LED for accuracy, and avoid overexposing one side. You’ll need to adjust intensity to match your ring light, or the contrast will look unbalanced. This isn’t studio-level gear, but it elevates everyday video quality with minimal setup.
Eliminate Shadows by Balancing Both Lights
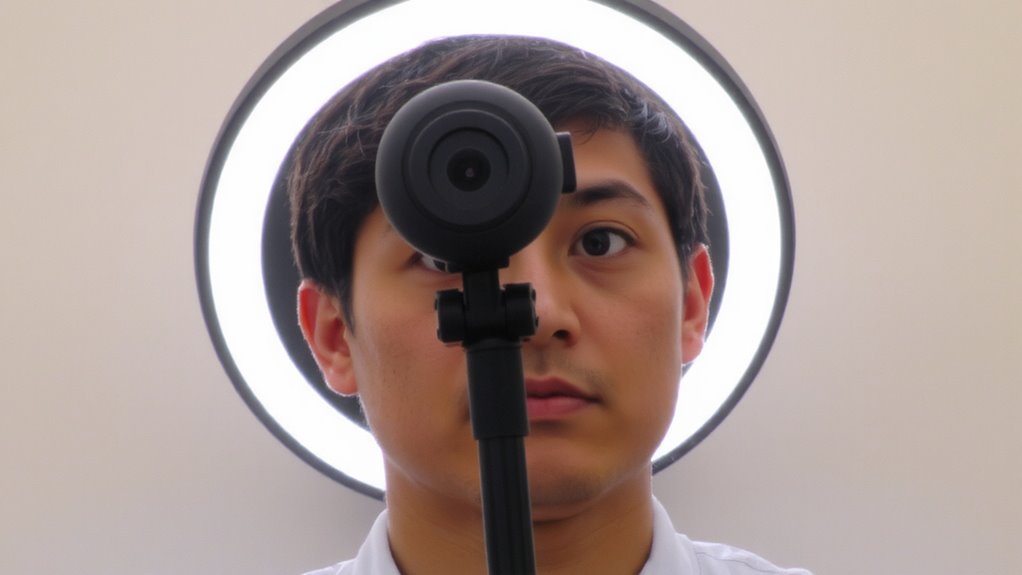
You’ve added a key light to bring dimension to your face, but uneven illumination can leave harsh shadows on the opposite side-especially under the jawline or around the eyes. To fix this, balance your key light with your ring light to improve shadow diffusion. Proper light placement is essential: position the key light at a 45-degree angle from your face and slightly above eye level, while the ring light stays centered behind the camera. This setup softens shadows without flattening facial features. Too much key light intensity will create contrast; too little negates its benefit. You’ll need to adjust brightness levels manually-many LED panels offer dimming, but not all ring lights sync well. Results vary based on room reflectivity and wall color. Test different positions, noting how shadows shift. It’s not about eliminating shadows completely, but controlling them for a natural, professional look.
Set the Right Color Temperature for Skin Tone
Lighting with the right color temperature makes a noticeable difference in how your skin tone appears on camera-too warm or too cool, and you’ll look tired or washed out. For most people, sticking between 4000K and 5000K delivers natural-looking skin balance and solid color accuracy without harshness. You don’t need studio-grade gear, but adjustable LED ring lights or key lights with color tuning help fine-tune results based on your skin tone and environment. A well-lit workspace can also benefit from selecting the best desk lamps for makeup, which are designed to provide optimal color rendering and brightness for facial features.
| Temp (K) | Effect on Skin Tone |
|---|---|
| 3000K | Often too warm, may look orange |
| 4000K–5000K | Balanced, neutral skin tone |
| 6500K | Too cool, risks washed-out appearance |
Don’t assume higher Kelvin is better-test under real conditions. Built-in dimming and color controls offer flexibility, but verify performance with video playback, not just appearance.
Avoid Overexposure With Proper Brightness
Most well-lit video calls rely not on maximum brightness, but on carefully controlled light levels that preserve facial detail without blowing out highlights. You’ll want to adjust intensity to match your environment-too bright, and your face looks washed out; too dim, and shadows creep in. A ring light set above or below your screen works best at 50–75% brightness, depending on ambient light. Always diffuse source with a softbox attachment or fabric cover to scatter harsh beams and create even, flattering illumination. Built-in brightness controls on LED panels let you fine-tune output, but without diffusion, even mid-level settings can cause glare. Matte finishes on faces and anti-reflective surfaces in your workspace help, too. While higher-output lights offer flexibility, they demand more precision. Overdoing it risks overexposure, especially on lighter skin or reflective surfaces, so start low and increase gradually for balanced, professional results.
Fix Common Ring Light Mistakes
A ring light can transform your video presence when set up correctly, but even the right gear won’t save you from common placement and usage errors. Poor ring placement-like positioning it too low or too close-creates harsh shadows or unflattering glares, especially on glasses. You want the ring centered at or slightly above eye level, about 18 to 24 inches from your face. Without proper light diffusion, the LED intensity can look clinical and reveal skin texture. Use a built-in diffuser or a soft fabric filter to scatter the light evenly. Over-relying on the ring alone often flattens facial depth, so pair it with subtle side lighting when possible. While diffusion softens the output, it may reduce brightness, so adjust intensity accordingly. Not all ring lights offer adjustable color temperature, limiting adaptability under different room lighting. Test your setup in real meetings-what looks good on camera may need tweaks over time. For those who prefer focused task lighting with adjustable color settings, consider a desk lamp for video calls.
Get Studio-Quality Lighting Without the Cost
You don’t need a Hollywood budget to achieve clean, professional lighting on camera-thoughtful choices and a bit of setup know-how go much further than price tags suggest. A single well-placed ring light delivers soft lighting that minimizes shadows and evens out skin tone, mimicking pricier studio setups. Pair it with a reflector or white foam board opposite the light to bounce illumination and enhance balance. For natural-looking results, adjust brightness to create a warm ambient glow without washing out your face. Many budget-friendly LED ring lights offer adjustable color temperatures (3000K–6500K) and dimming controls, letting you fine-tune output. Look for models with stable clamp mounts and USB power for flexibility. While cheaper units may lack durability or precise dimming, real-world testing shows they perform well in controlled settings. Just avoid overly glossy finishes that cause glare. With deliberate placement and calibration, you can achieve pro-level results-no high-end gear required.
On a final note
You can achieve balanced, professional lighting using a ring light and key light, but placement and settings matter. Position the ring light close to eye level for even facial illumination, then add a key light at a 45-degree angle for depth. Match both lights to a 5500K color temperature to keep skin tones natural. Set brightness between 1000–1500 lux to avoid overexposure, and diffuse harsh rays with a softbox or sock. While this combo cuts shadows effectively, too much intensity flattens features-fine-tune output based on room ambient light. Most mid-range ring lights (like Neewer or UBeesize) offer dimming and CRI ratings above 90, making them reliable for daily use. Still, they can’t fully replicate studio setups with three-point lighting and larger modifiers. Results depend on room layout, wall color, and webcam sensitivity-test calls beforehand. A small investment in lighting gear pays off in visual clarity, but don’t expect miracles in poorly reflective spaces.